
Script to video AI sounds like a single action: paste a script and download a finished video. The useful version is a set of decisions. Your script must become scenes, each scene needs a visual job, and the final video must preserve the meaning of the source. Seedance 2.5 makes one part of this workflow more capable. It can generate up to 30 seconds of audiovisual material in one pass, work with references, edit a source video, and extend footage. That is enough room for a complex shot or short scene. It is not automatically a complete script-to-video system. TapVid takes the other route. It is an Explainer Video Engine that starts with content you already own, such as a script, article, PDF, PRD, or product copy, then organizes that material into a structured explainer video. This guide shows how to choose the right path, prepare the script, direct Seedance when you need generated shots, and keep the message intact when you need a full explainer.
Create an explainer video with TapVid
01
What script to video AI actually does
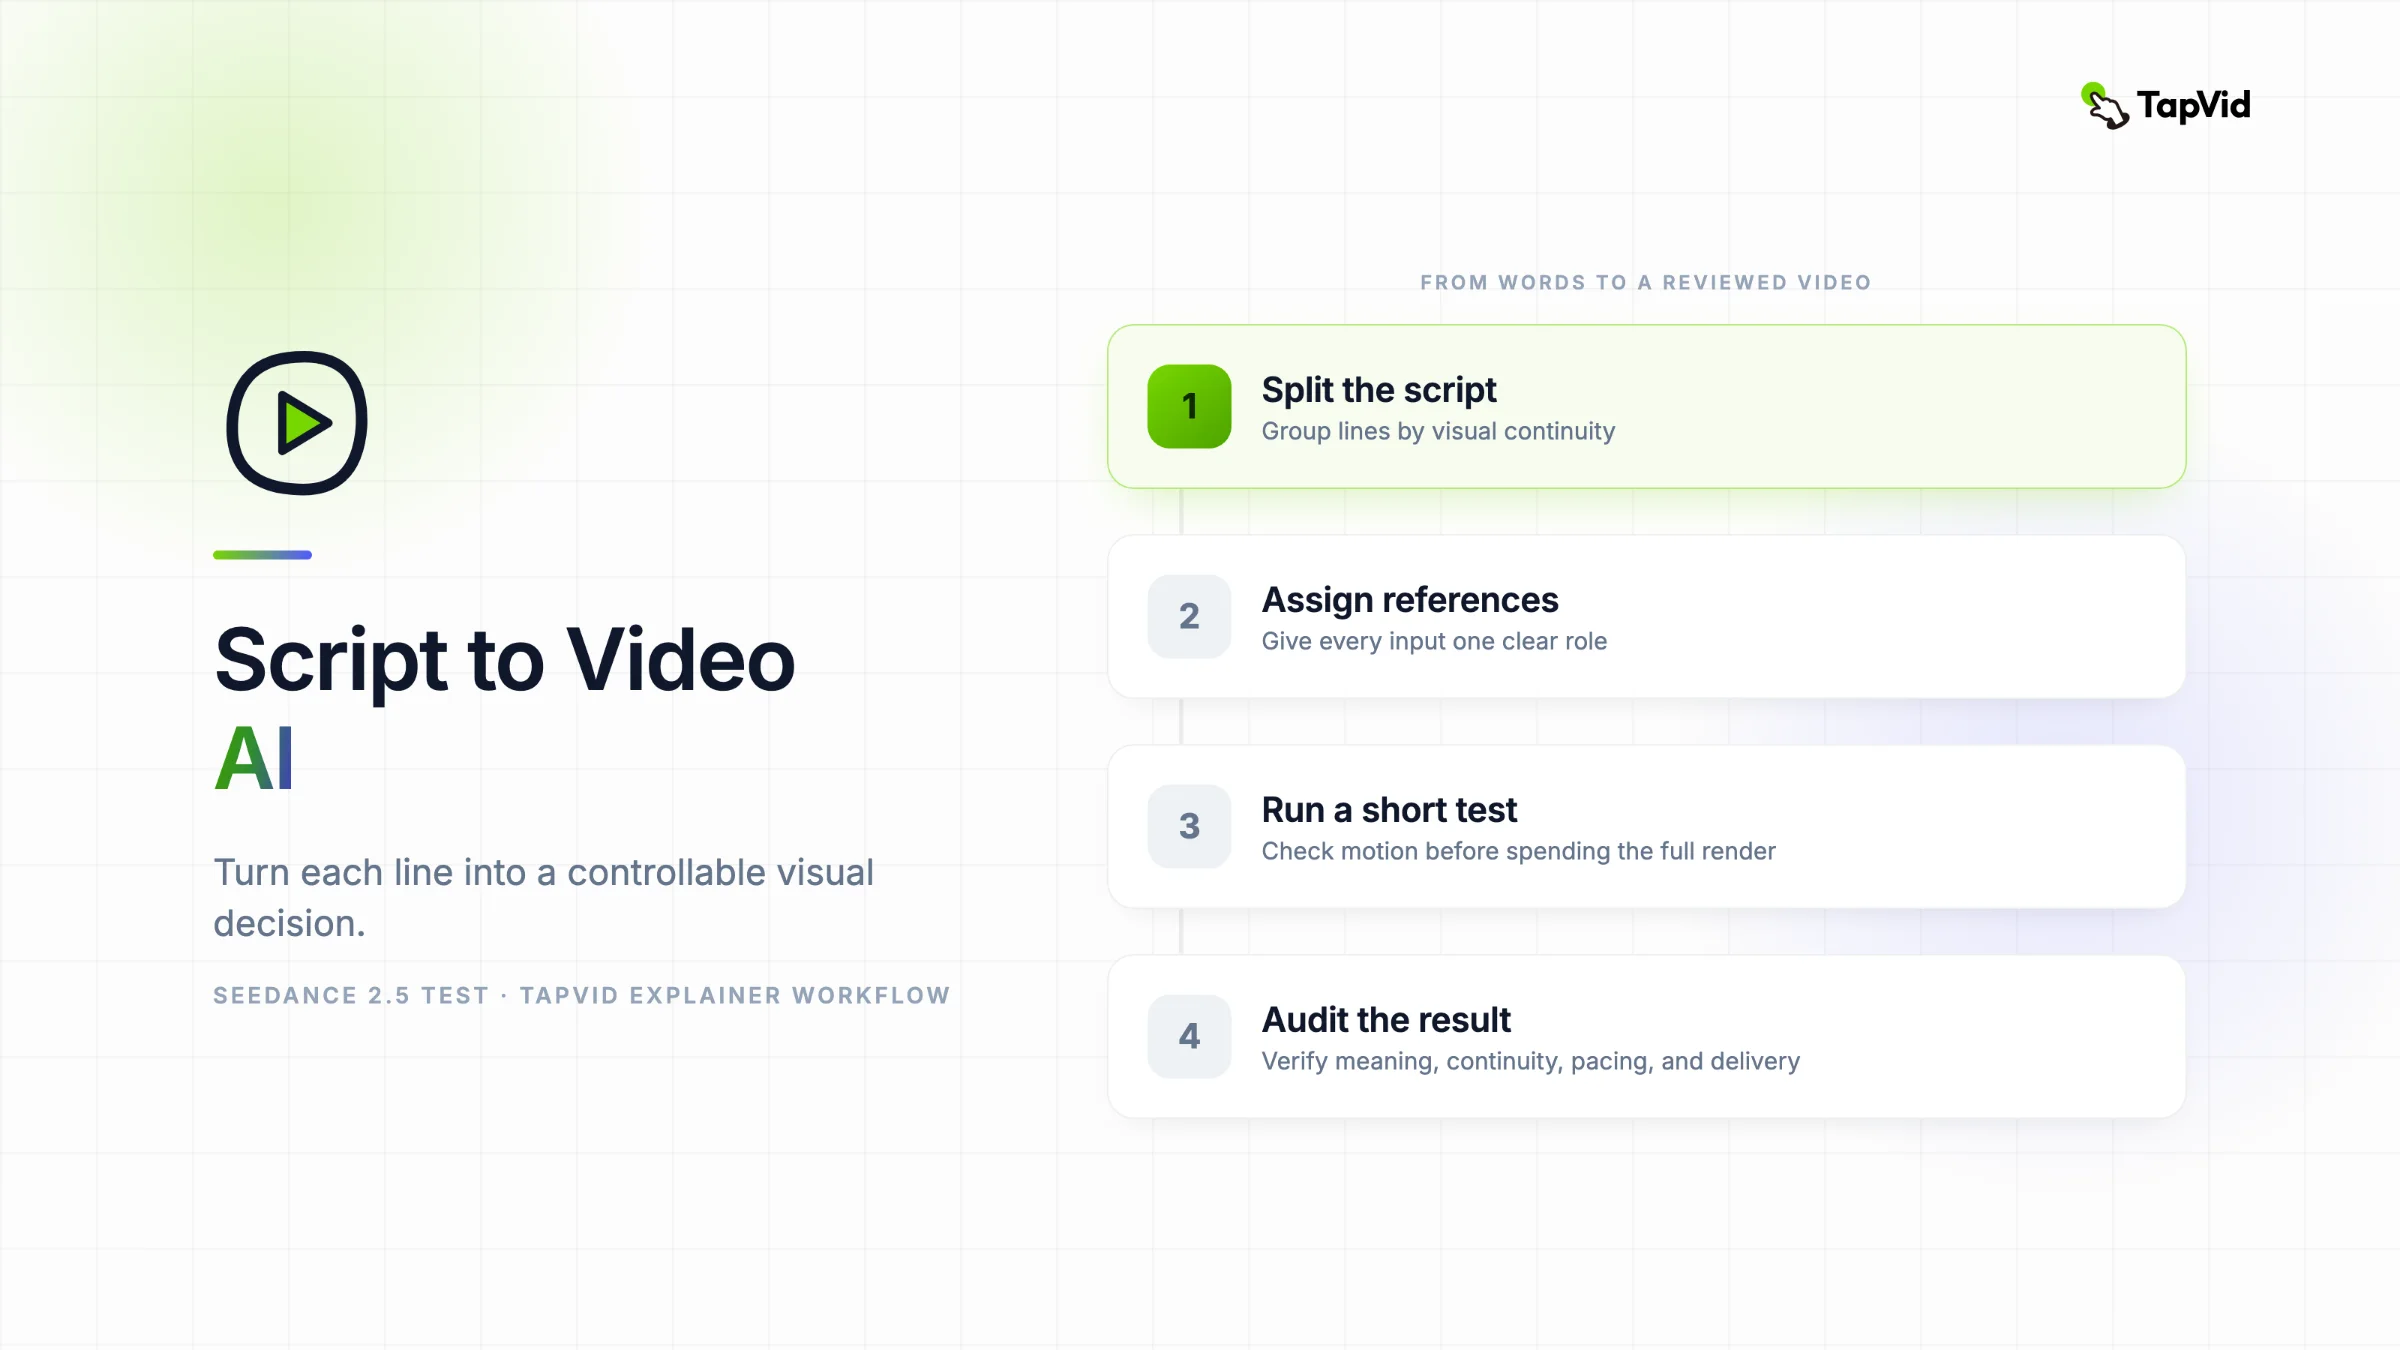
A written script contains dialogue, narration, intention, and sometimes scene directions. A video needs timed images, movement, sound, text, and transitions. The conversion requires at least five steps:
- Break the script into meaningful units.
- Decide what the viewer should see during each unit.
- Create or select the visual assets.
- synchronize narration, sound, and captions.
- Review the result against the approved script.
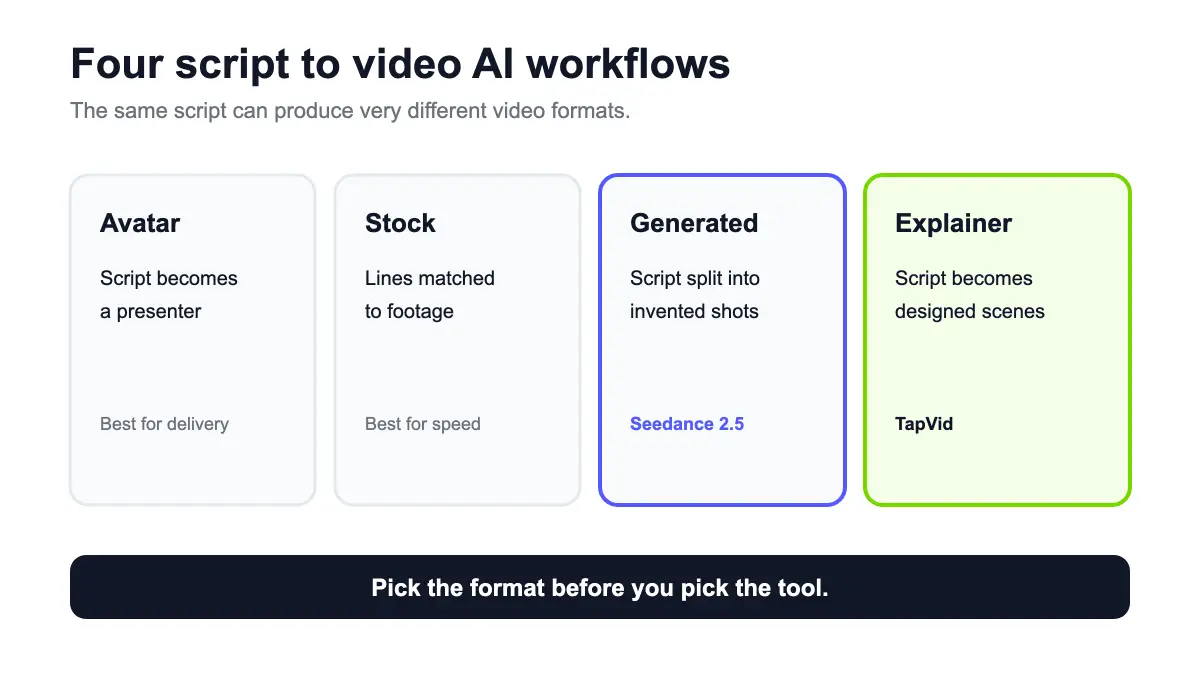
Different products automate different parts. Avatar tools place the script in a presenter's mouth. Stock-based tools match lines to library footage. Generative video models invent shots. Explainer engines translate the logic of the source into designed, multi-scene motion.
If you do not identify the desired format first, the output may be technically complete but wrong for the job.
02
The two script-to-video paths that matter here
03
Path 1: script to generated shots
Use this path for a commercial, short film, visual story, mood piece, or a dramatic opening. The script becomes a shot list. Each shot is rendered by a model such as Seedance 2.5, then selected and edited into the final piece.
The model is responsible for what the camera sees and hears. You are responsible for breaking the script into shots, controlling identity, and choosing which generation is usable.
04
Path 2: script to structured explainer
Use this path for a product walkthrough, lesson, article summary, knowledge video, or launch explanation. The script already carries the message. The system must preserve its sequence while creating motion graphics, narration, captions, and transitions.
The engine is responsible for visualizing the source without turning it into unrelated footage. The creator remains responsible for the facts and final approval.
Many projects use both paths. A product explainer may open with a generated scene, then switch to diagrams and screenshots. The mistake is expecting one 30-second shot to do the job of a complete explanation.
05
Prepare your script before choosing a model
Start with an approved version. Remove comments, alternate lines, and outdated claims. Label anything that must be shown exactly, such as a product name, interface state, number, quotation, or legal phrase.
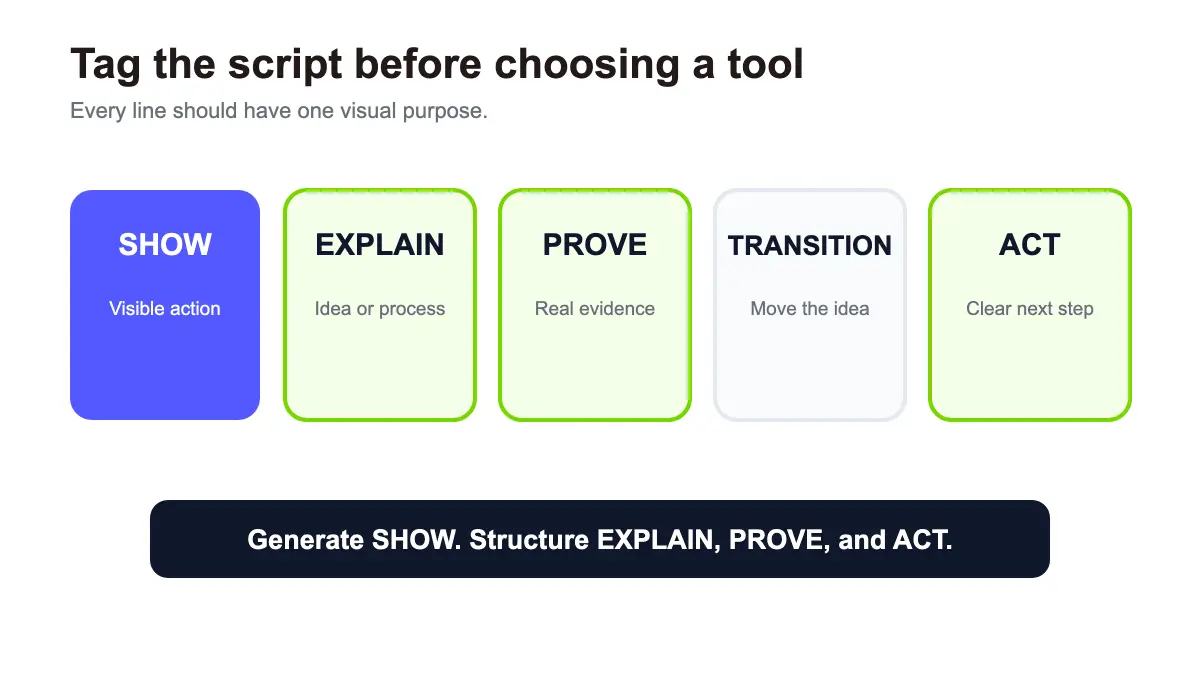
Then tag each paragraph with one visual purpose:
- Show: the line describes a visible action or environment.
- Explain: the line teaches a relationship or sequence.
- Prove: the line needs a screenshot, quotation, result, or source.
- Transition: the line moves the viewer to the next idea.
- Act: the line asks the viewer to do something.
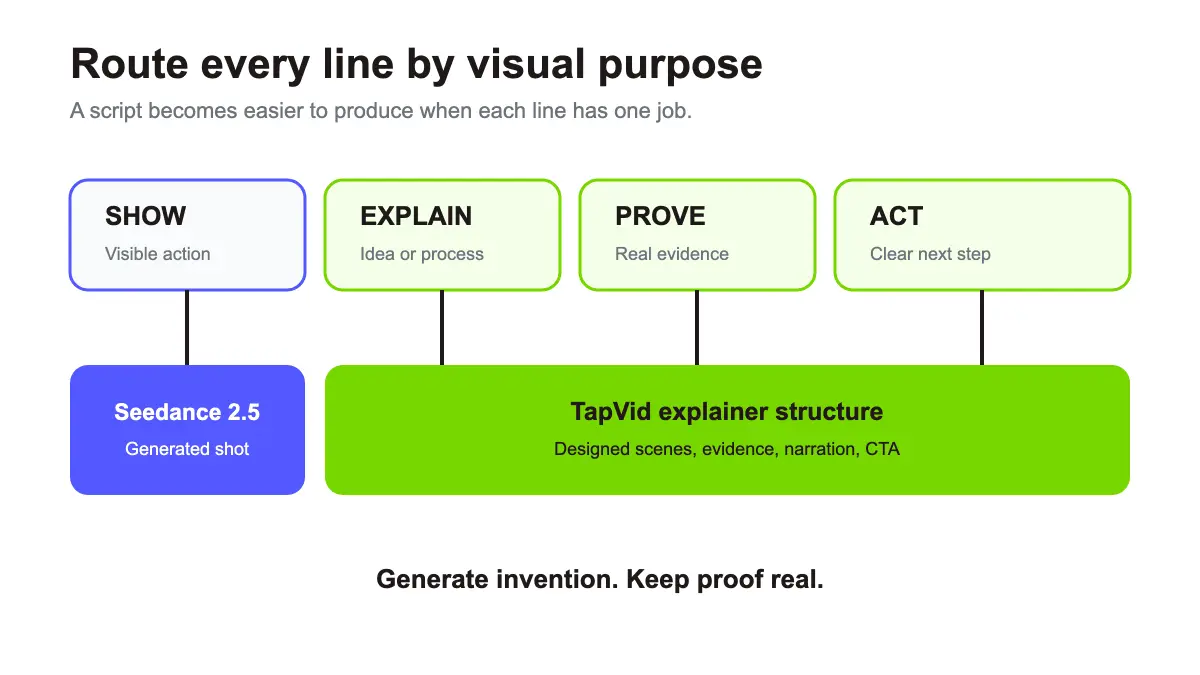
This simple pass tells you which parts belong in Seedance and which parts need a structured explainer scene.
For example, a launch script might include:
SHOW: A founder closes six editing tabs and drops a printed product brief on the desk. EXPLAIN: TapVid turns the approved brief into a structured explainer with narration, captions, and motion. PROVE: Show the real brief beside the generated scene list. ACT: Start with your own product copy.
The first line could become a Seedance shot. The next three need exact product meaning and evidence.
06
How to turn a script into Seedance 2.5 shots
ByteDance describes Seedance 2.5 as an audio-video generation model for 30-second storytelling, reference control, and editing. Runway's Seedance 2.5 guide provides Reference, Keyframe, Edit, and Extend modes, along with 480p or 720p output and durations from 4 to 30 seconds.
Before writing each shot from scratch, use the Seedance 2.5 prompt library to compare reference plans, timing maps, and guardrails for common workflows.
07
Step 1: split by visual continuity
Do not split only at sentence boundaries. Split when the location, time, subject, camera logic, or visual goal changes.
A 30-second scene can contain several actions if they happen in one coherent environment. A five-second cut may still need its own generation if the character, place, or style changes completely.
Create a shot table:
| Shot | Script lines | Visual goal | Duration | References |
|---|---|---|---|---|
| 1 | Opening problem | Founder overwhelmed by tabs | 6s | Actor, desk, camera move |
| 2 | Turning point | Printed brief becomes a clear plan | 8s | Brief, style frame |
| 3 | Product proof | Real interface and output | 10s | Use real screen capture |
| 4 | CTA | Creator reviews finished video | 5s | Actor, final screen |
Only the first two rows are good candidates for pure generation. Product proof should use real interface evidence rather than an invented UI.
08
Step 2: attach references by role
Seedance 2.5 on Runway accepts as many as 50 references, including up to 30 images, 10 videos, and 10 audio clips. Use the smallest set that fully defines the shot.
Write each role explicitly:
@Image 1 defines the founder's face, hair, and clothing. Ignore the original room. @Image 2 defines the desk, laptop, and warm morning light. @Video 1 defines the slow lateral camera movement only. Ignore its actor and setting.
This instruction separates identity, environment, and motion. It is more precise than asking the model to "use all references."
09
Step 3: translate script language into visible direction
Scripts often contain thoughts that cannot be filmed. "She realizes the old workflow is broken" is not a visible instruction. Convert it into behavior:
She scans the six open editing windows, stops, exhales, closes the laptop halfway, then places the printed brief in the center of the desk.
Keep the emotion in physical actions, framing, rhythm, and sound. Do not rely on the model to interpret an abstract business message.
10
Step 4: define the end state
A usable shot must hand off to the next shot. State what is visible when the generation ends.
End on a locked overhead frame with the printed brief centered and both hands out of frame.
The end state gives your editor a clean transition point. It also helps Keyframe mode when a specific composition matters.
11
Step 5: run a short test before the full scene
Test the central action at 4 to 8 seconds. Check identity, object count, camera direction, and sound. Only then generate the longer scene or use Extend.
Runway charges Seedance credits per second, so a short diagnostic is cheaper than discovering a repeated mistake after a full 30-second render.
12
What happened in my paid founder-desk test
I prepared a creator-owned founder-at-a-desk frame for Shot 1. It fixes the wardrobe, laptop, paper brief, lighting, and desk layout before any motion is added.

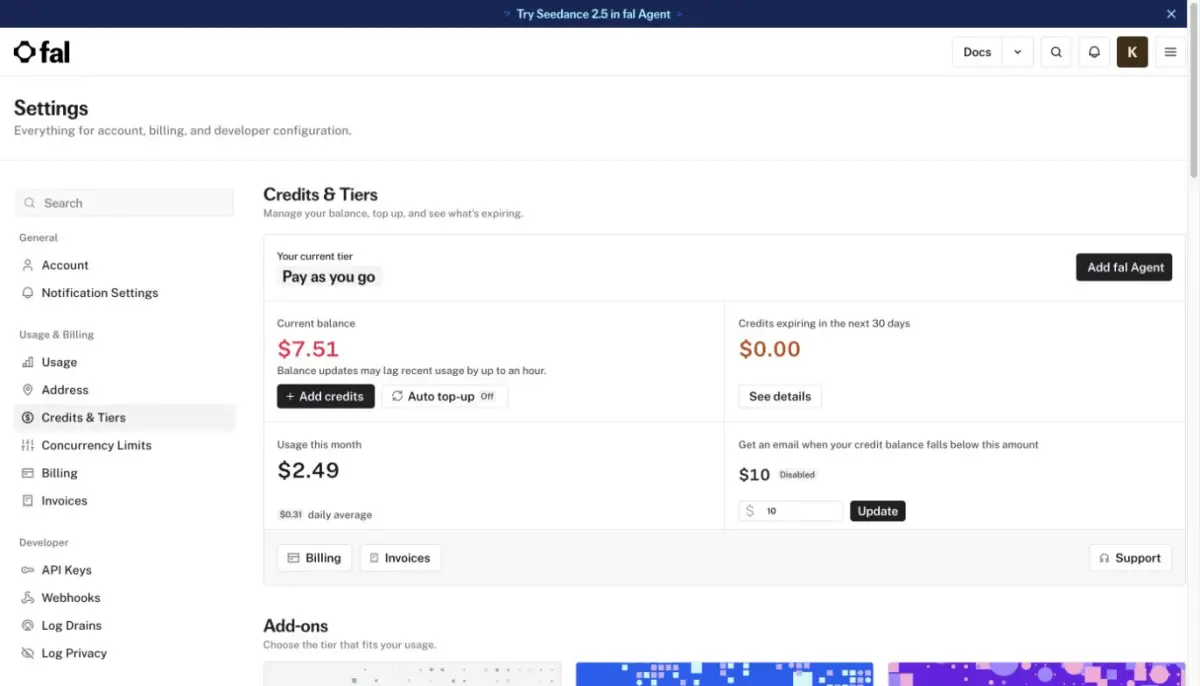
On August 8, 2026, I ran the shot through fal's official ByteDance Seedance 2.5 image-to-video endpoint. I used its $0 monthly pay-as-you-go tier after buying $10 in one-time credits. The four-second 480p run had native audio enabled. The page estimated roughly $0.88, while three matching four-second tests reduced the balance by $2.49 in total, or $0.83 per run on average.
The prompt asked the founder to scan six editing windows, pause, close the laptop halfway, move the printed brief to the center, and end with both hands out of frame. It also requested one slow lateral camera move and stable anatomy.
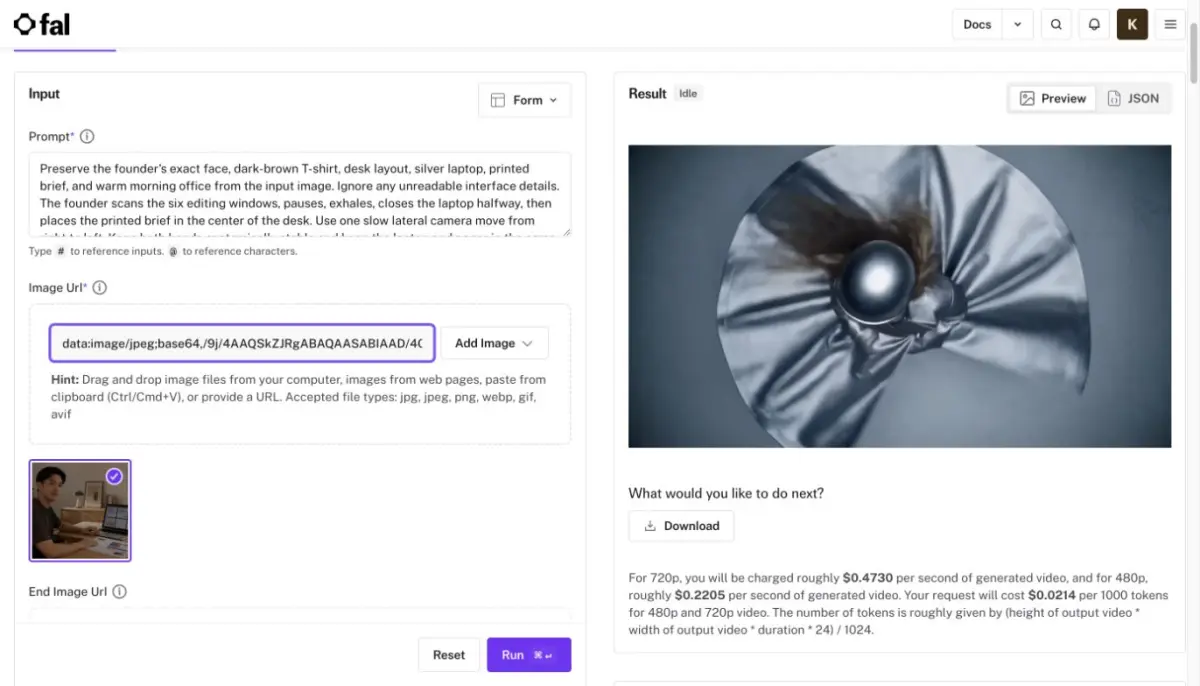
The downloaded MP4 was 854 by 480 pixels, 24 fps, and 4.064 seconds long. It contained H.264 video and a non-silent AAC audio track.

The opening frame stayed close to the source. The face, dark-brown shirt, laptop, printed brief, cup, lighting, and office layout remained consistent. The laptop screen did not preserve exact interface text, which is expected and is why I told the prompt to ignore unreadable UI details.

The hands remained plausible during the central motion, and the face did not visibly switch identity. The lateral camera move was present without causing the desk objects to jump.

The result did not follow every end-state constraint. The laptop closed fully instead of halfway, the paper remained low in the frame rather than perfectly centered, and both hands were still visible. This is a useful failure. The model preserved identity and object continuity better than it obeyed a crowded sequence of end-state instructions in four seconds. I would split the action into two shots or give it more time instead of adding more prompt clauses.
Runway and Dreamina free accounts both let me configure Seedance 2.5 but opened subscription screens on submission. fal was the cheapest working route I verified for this short diagnostic, and it required payment rather than a subscription.
13
How to turn a script into a TapVid explainer
If the script is already the authority, keep it attached to the workflow. TapVid starts from creator-owned content and turns it into an explainer video. It does not need to invent a cinematic world around every line.
14
Step 1: name the viewer outcome
Add one sentence before the script:
After watching, an independent creator should understand the difference between generating one visual shot and producing a complete explainer from an approved script.
This outcome helps decide what needs a diagram, a comparison, a screenshot, or a simple text beat.
15
Step 2: preserve evidence blocks
Mark screenshots, quotations, data, and product footage as fixed assets. A generated substitute is not evidence. If the script says a button exists, show the current product interface or remove the claim.
16
Step 3: generate the explainer structure
Use TapVid's AI explainer video generator to turn the script into scenes. Review the opening hook, the logic between scenes, the density of on-screen text, and whether the final action follows from the explanation. For a launch script built around product screens, the AI product demo video generator is the closer starting point.
The strongest scene is not always the most animated. A short definition may need one diagram and a calm camera. A process may need four connected steps. Motion should help the viewer understand the script.
17
Step 4: bring in Seedance only for the visual gaps
Once the explainer structure is clear, identify scenes that need footage you cannot film or design easily. Generate those shots in Seedance, then return them to the full edit.
This order protects the message. If you generate attractive clips first, the script often gets rewritten to justify the footage.
18
A reusable script-to-Seedance prompt
Use this for one approved shot:
Convert the script excerpt into one Seedance 2.5 shot. Keep only actions that can be seen or heard. Output a reference manifest, chronological action, one camera direction, lighting, audio, end state, and no more than five preservation constraints. If the excerpt requires a location change, identity change, or more than one camera setup, recommend a shot split instead. Script excerpt: [paste].
Review the result before generation. Delete any adjective that does not change the visible frame.
19
A reusable script-to-explainer brief
Use this for a complete source:
Turn the approved script below into a 60 to 90-second explainer plan. Preserve every factual claim and mark anything that needs a screenshot or citation. For each scene, provide narration, visual purpose, on-screen text, asset requirement, and transition. Do not add facts or rewrite the author's position. Script: [paste].
After approval, send the original script and the reviewed plan into the explainer workflow.
20
Quality control for script to video AI
21
Meaning check
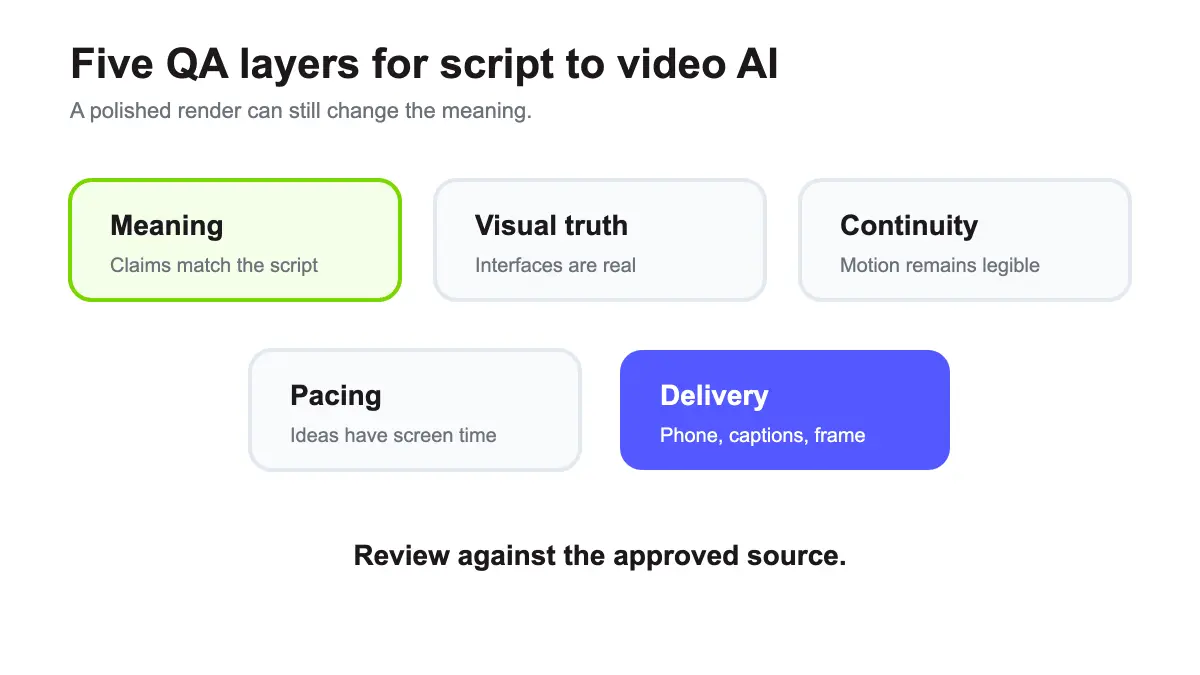
Read the approved script beside the final narration. Look for missing qualifiers, changed numbers, stronger claims, and examples that became general facts.
22
Visual truth check
Confirm that screenshots, labels, diagrams, and product states are current. A realistic generated interface is still a false interface.
23
Continuity check
Watch without sound. Does the subject, setting, direction of movement, and object placement remain understandable? Then listen without looking. Does the narration still form a complete argument?
24
Pacing check
One idea should have enough screen time to register. If every sentence introduces a new visual style, the viewer spends more effort reorienting than understanding.
25
Delivery check
Export in the aspect ratio required by the destination. Review captions on a phone-sized screen. Check whether the first frame works as a thumbnail or opening state.
26
Which script-to-video workflow should you choose?
| Script type | Primary need | Best starting workflow |
|---|---|---|
| Short film scene | Performance and camera | Seedance 2.5 shots |
| Product advertisement | Controlled visuals plus real proof | Hybrid |
| Knowledge explainer | Factual structure | TapVid |
| Product launch | Approved copy, screenshots, clear sequence | TapVid or hybrid |
| Animated brand story | Visual metaphor plus message | Hybrid |
| Social mood clip | One memorable scene | Seedance 2.5 |
27
Common mistakes
28
Pasting the whole script into one prompt
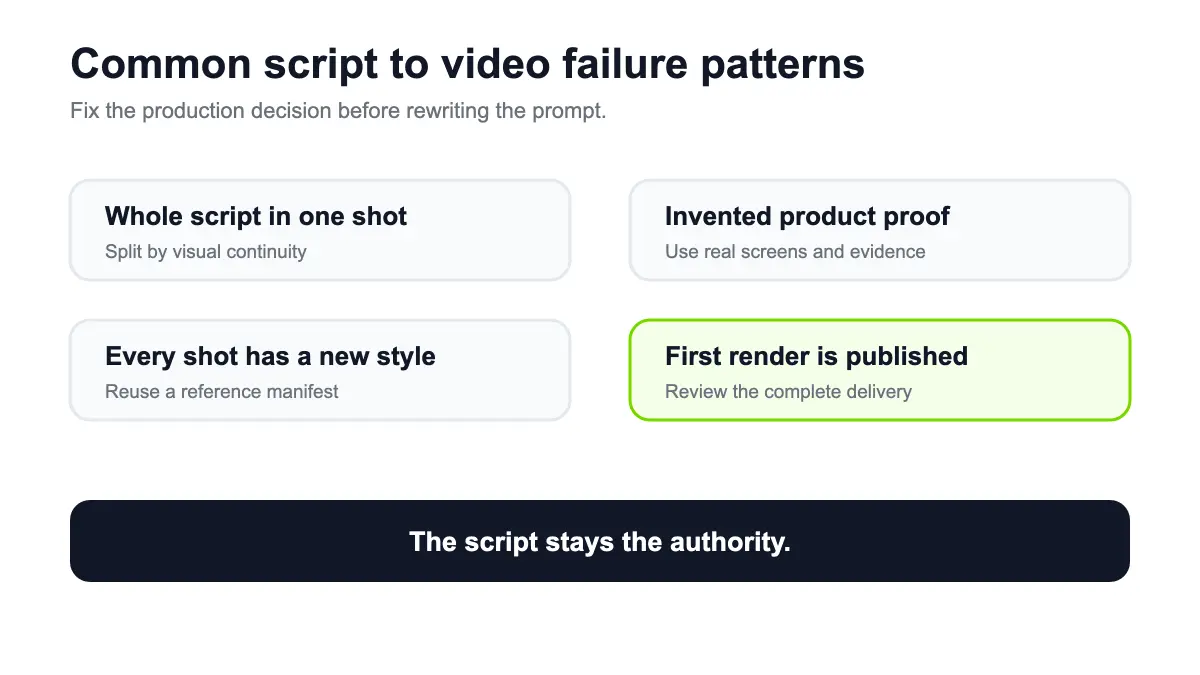
A full script contains more decisions than one generated shot can hold. Split it into visual units or use an engine designed for multi-scene explanation.
29
Letting the model invent product proof
Do not generate fake interfaces, testimonials, results, or customer footage. Use real evidence and generate only the surrounding creative material.
30
Writing every scene in a different style
Define a reusable style and reference manifest. Variation should support the story, not advertise how many models you used.
31
Keeping every line of narration
Video is not a document read aloud. Remove repeated setup and let visuals carry information where they can. Keep claims and logical steps intact.
32
Publishing the first render
Review the full clip, not the first frame. Generated motion may drift late, and structured scenes may contain small text or pacing problems that only appear on the delivery device.
33
Final recommendation
Script to video AI is not one technology. Seedance 2.5 is a strong choice when a script needs to become a controlled audiovisual shot. TapVid is the better starting point when your existing script must become a complete, structured explainer video.
Use the script as the authority. Generate footage where invention helps. Keep evidence real. If you already have the approved script, register for TapVid and turn it into an explainer before spending credits on supporting shots.
34
Frequently asked questions
Can I paste a full script into Seedance 2.5?
You can provide a long prompt, but a full multi-scene script usually needs to be split into shots. Seedance 2.5 generates up to 30 seconds in one pass, and one coherent scene is easier to control than several unrelated locations and characters.
How many references can Seedance 2.5 use?
On Runway, one generation accepts up to 50 references: as many as 30 images, 10 videos, and 10 audio clips.
What is the best script format for AI video?
Use clear scenes with narration, visible action, asset requirements, and an end state. Separate factual evidence from generative footage.
Can script-to-video AI make long videos?
Yes, but longer work is usually assembled from structured scenes or multiple generated shots. A single model generation is not the same as a complete long-form edit.
Should I use Seedance 2.5 or TapVid for an explainer?
Use Seedance for invented or edited shots. Use TapVid when an existing script, article, PDF, or product document must become a coherent explainer with several linked scenes.