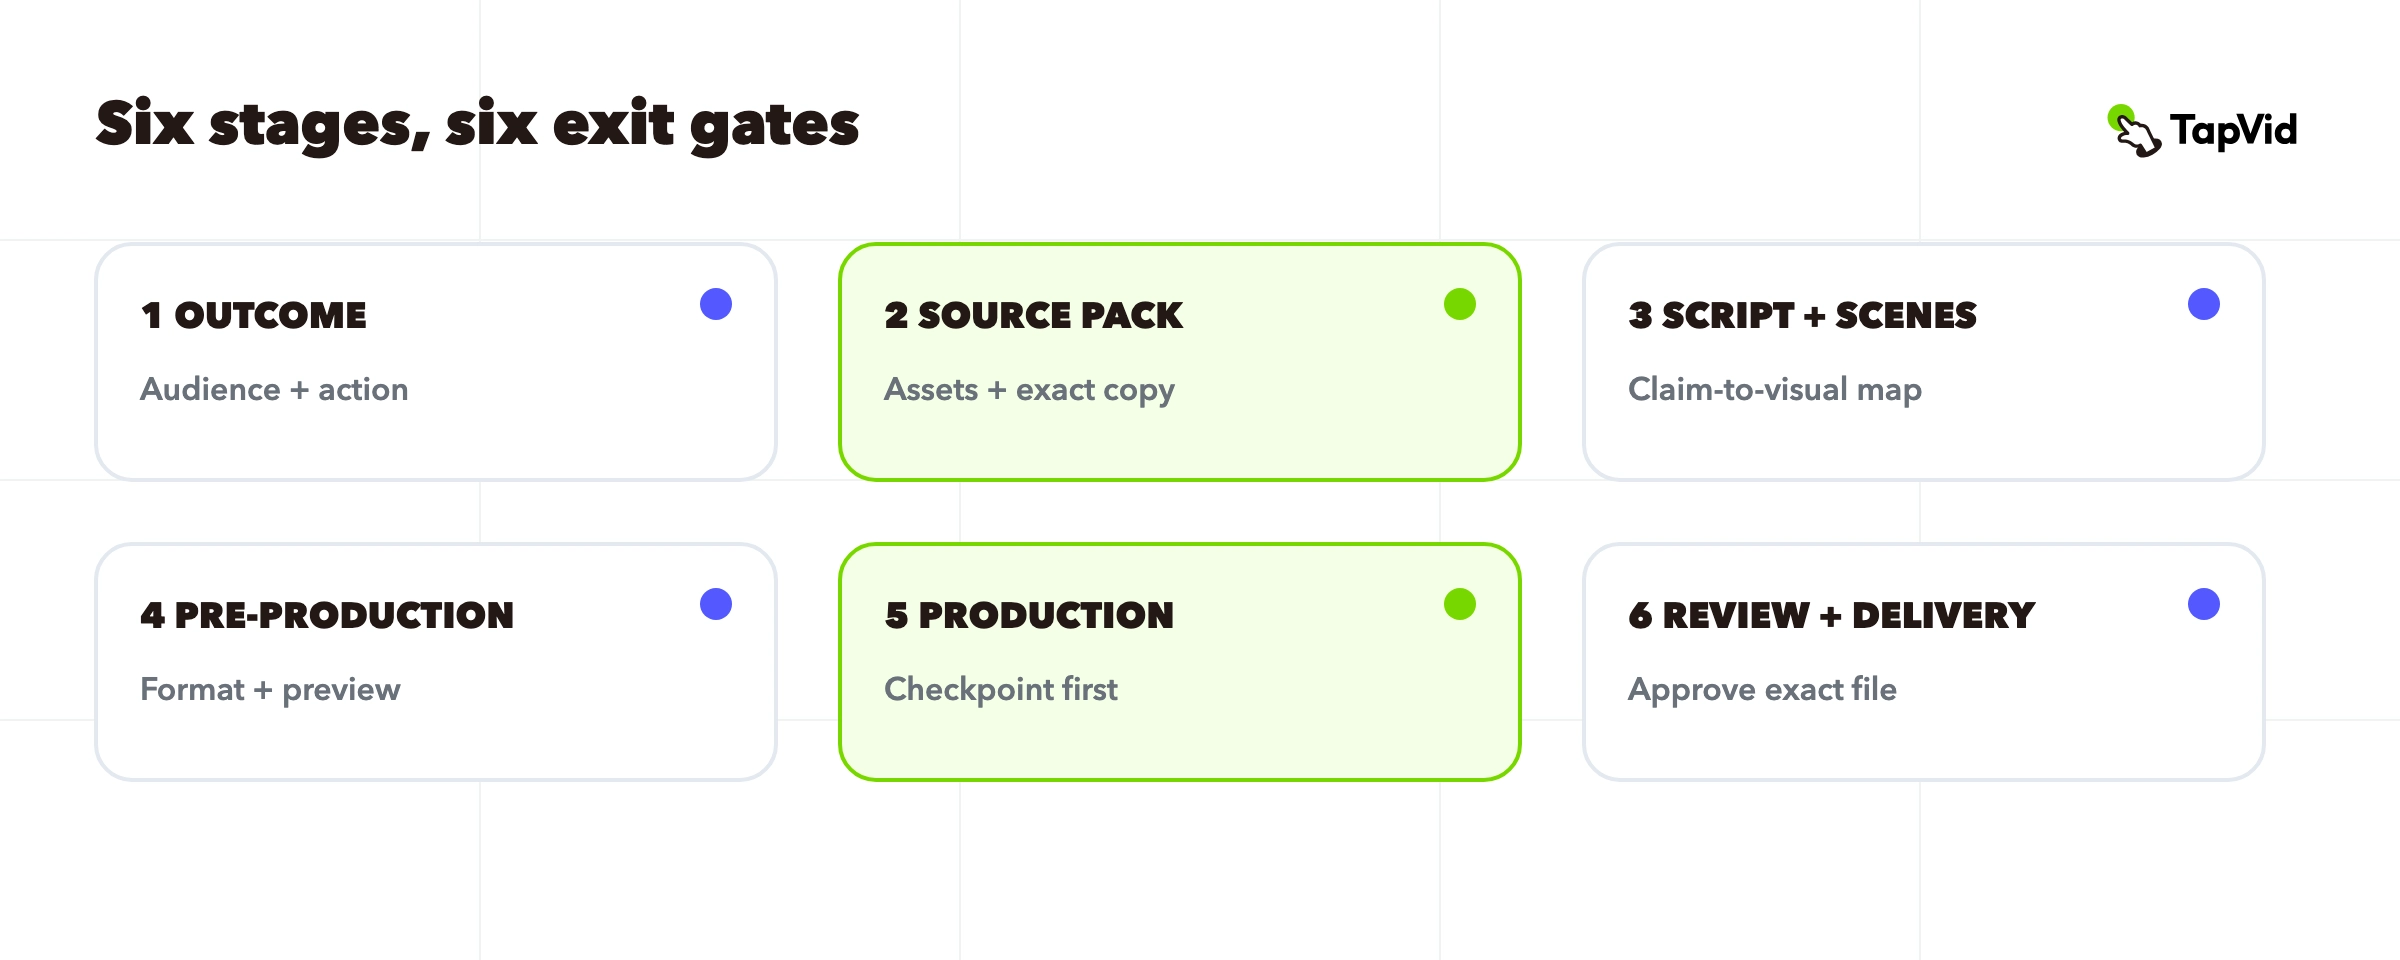

The video production process is the sequence that turns a business objective and approved source material into a video that can be reviewed, delivered, and changed later. A useful process does more than list pre-production, production, and post-production. It defines what must be true before the team moves forward. This guide breaks the work into six stages: outcome, source pack, script and scenes, pre-production, production, and review plus delivery. Each stage has an exit condition, so a small team can catch wrong claims, wrong assets, and expensive direction changes before they reach the final cut.
01
What the video production process includes
The video production process is an ordered set of decisions, assets, production actions, and approvals. Traditional guides often group it into pre-production, production, and post-production. The Adobe video production overview uses that broad structure, while the Georgia Tech planning guide emphasizes audience, purpose, outline, script, and storyboard before recording. Those categories are useful, but a working team also needs exit gates that say when each stage is complete.
This guide uses six stages because it separates decisions that fail differently. A weak objective is a brief problem. An unsupported number is a source problem. A wrong product screen is a correspondence problem. A late aspect-ratio change is a pre-production problem. A typo in one card is a local revision. Treating all of them as editing notes hides the cause and makes every correction feel expensive.
02
Stage 1: Define the outcome and approval boundary
Write one sentence that names the audience, the decision or action the video should support, the channel, and the approver. For example: help existing trial users understand one export feature on the product page, approved by the product owner. That sentence is more useful than a broad request such as make a brand video. It narrows the reader, scene density, evidence burden, and final call to action.
Also write what the video will not do. A product launch teaser does not need to teach the whole interface. A tutorial should not quietly become a sales reel. A company-profile story should not make an unsupported product-performance claim. Exit this stage only when the team agrees on the viewer, desired result, publication surface, one owner, and out-of-scope jobs. If any of those changes later, return to the brief instead of hiding the change inside an edit request.
03
Stage 2: Lock the source pack and exact copy
The source pack is the set of materials the production is allowed to use: current product images, logo files, UI screenshots, footage, diagrams, approved copy, pronunciation notes, and permissions. Give every item a stable name and version. Mark stale screens and replaced files. Put prices, measurements, product names, legal phrases, and other literal facts in a protected-copy list so no writer or visual system treats them as optional wording.
Separate facts from treatment. The exact UI label is a fact. Whether it arrives with a quick crop or a slow push is treatment. The product image is a source asset. Whether it sits over a clean background or beside a diagram is treatment. Exit when every factual line has an owner and source, every asset has a current version, and the team knows which materials may appear publicly. Missing rights, unknown product status, or contradictory source files block the next stage.
04
Stage 3: Build the script and scene-to-source map
Write the script as a sequence of viewer questions and answers, not as a list of features. Then give each scene a stable ID and bind it to the narration line, on-screen copy, source asset, treatment, and reviewer. This scene-to-source map makes correspondence visible before production. If a sentence says the temperature appears on the bottle, the mapped scene should show the approved temperature display rather than a generic hydration image.
| Scene field | Required value | Exit test |
|---|---|---|
| Narrative job | What the viewer should understand now | The scene earns its place in the sequence |
| Approved words | Narration and on-screen text | Protected copy matches the source |
| Source asset | Exact file, screen, diagram, or shot | The right object supports the claim |
| Treatment | Crop, motion, duration, transition, or emphasis | Creative choices stay separate from facts |
| Reviewer | Owner for the line and asset | No approval is waiting on an unnamed person |
Read the script aloud and review the map without polished visuals. Fix logic while changes are cheap. Exit when the spoken argument works on its own, the scene order is understandable, every product claim has a source, and the approver can identify which row to change. This is the last safe point to replace the core narrative without wasting finished animation or recorded performance.
05
Stage 4: Make production choices before rendering
Pre-production turns the approved scene map into production constraints. Confirm aspect ratio, target duration, language, voice, caption plan, music permission, brand references, required resolutions, and delivery format. Decide whether each scene uses real product assets, recorded footage, deterministic diagrams, generated motion, or a combination. The goal is not maximum detail. It is to remove choices that would be costly or contradictory after scenes are rendered.
Use a low-cost preview when timing or composition is uncertain. A storyboard, animatic, rough voice track, or sample scene can reveal that a dense UI cannot be read in two seconds or that a vertical crop cuts out the product label. Exit when the team can review the full sequence at low fidelity, media permissions are known, technical outputs are specified, and the visual direction does not require redrawing facts that should remain literal.
06
Stage 5: Produce in checkpoints
Do not wait for a finished cut to discover a repeated error. Review one representative scene early: the hardest product screen, the densest data card, or the asset most likely to be altered incorrectly. Then review a sequence that proves the handoff between two scenes. Once the team trusts the template, pacing, and source handling, scale production across the remaining scenes.
Assign different work to the method that can preserve it. Literal copy, product images, logos, UI screens, and deterministic labels should be controlled like code and data. Background motion, transitions, atmosphere, and non-factual texture can use generative treatment when appropriate. TapVid describes the division as giving code the things that must be exact and pixel diffusion the things that should look good. The point is not one technology winning; it is matching each element to the right acceptance test.
Exit production when every scene exists in the target ratio, narration and captions are synchronized, the mapped source asset is present, and known placeholders are explicit. Do not treat an attractive render as approval. The output now moves to factual review, story review, and delivery checks.
07
Stage 6: Review, revise, and deliver
Run review in passes. First compare every product image, UI screen, logo, number, model name, and protected phrase with the source pack. Second watch for correspondence: the spoken claim and visible evidence must refer to the same product and state. Third watch without notes for story continuity and pace. Finally, test the delivered file on the actual surface, including captions, sound, mobile cropping, poster frame, and playback.
Route each note to the narrowest valid change radius. A typo or caption timing issue is a block change. A replaced screenshot or altered scene treatment is a scene change. A new audience, promise, or call to action is a brief change and may invalidate later work. Record the approved version, delivery settings, source pack version, and known limitations together. Exit only when the named approver accepts the exact file and the team can reproduce which sources and decisions created it.
08
Use a small-team production checklist
A twenty-person startup does not need a heavy film-studio system for every video. It needs one owner, a source pack, a scene map, a representative-scene check, and a final acceptance pass. Keep the artifacts small enough that the team will actually maintain them. A shared table can hold the brief, scene IDs, source links, protected copy, status, and approver. Use comments for discussion, but move the final decision back into the row.
- One-sentence audience, outcome, channel, and owner are approved.
- Current assets and protected copy are versioned in one source pack.
- Each scene binds narration, visible copy, source asset, treatment, and reviewer.
- Ratio, duration target, language, captions, audio, permissions, and delivery format are decided.
- One representative high-risk scene passes before production scales.
- Final review checks asset fidelity, information fidelity, correspondence, story continuity, and destination playback.
- The delivered file, source version, approval, and known limitation are recorded together.
Add complexity only when the risk requires it. Regulated copy, several SKUs, several languages, external agencies, or frequent revisions may justify more gates and automation. A one-off internal update may need less. The test is whether the process helps the team catch a costly error sooner and reproduce an approved output later.
09
Real case: a 27-second product launch output
The Good Case library entry Smart Insulated Water Bottle Premium Launch Teaser is a short asset-to-video result. Its public page shows a 27-second, 16:9 launch video and an opening transcript that moves from material detail to use: single-form construction, sealed press, temperature retention, visible temperature, and a final placeholder for product name and tagline. That makes it useful as a review object for the production and delivery stages.
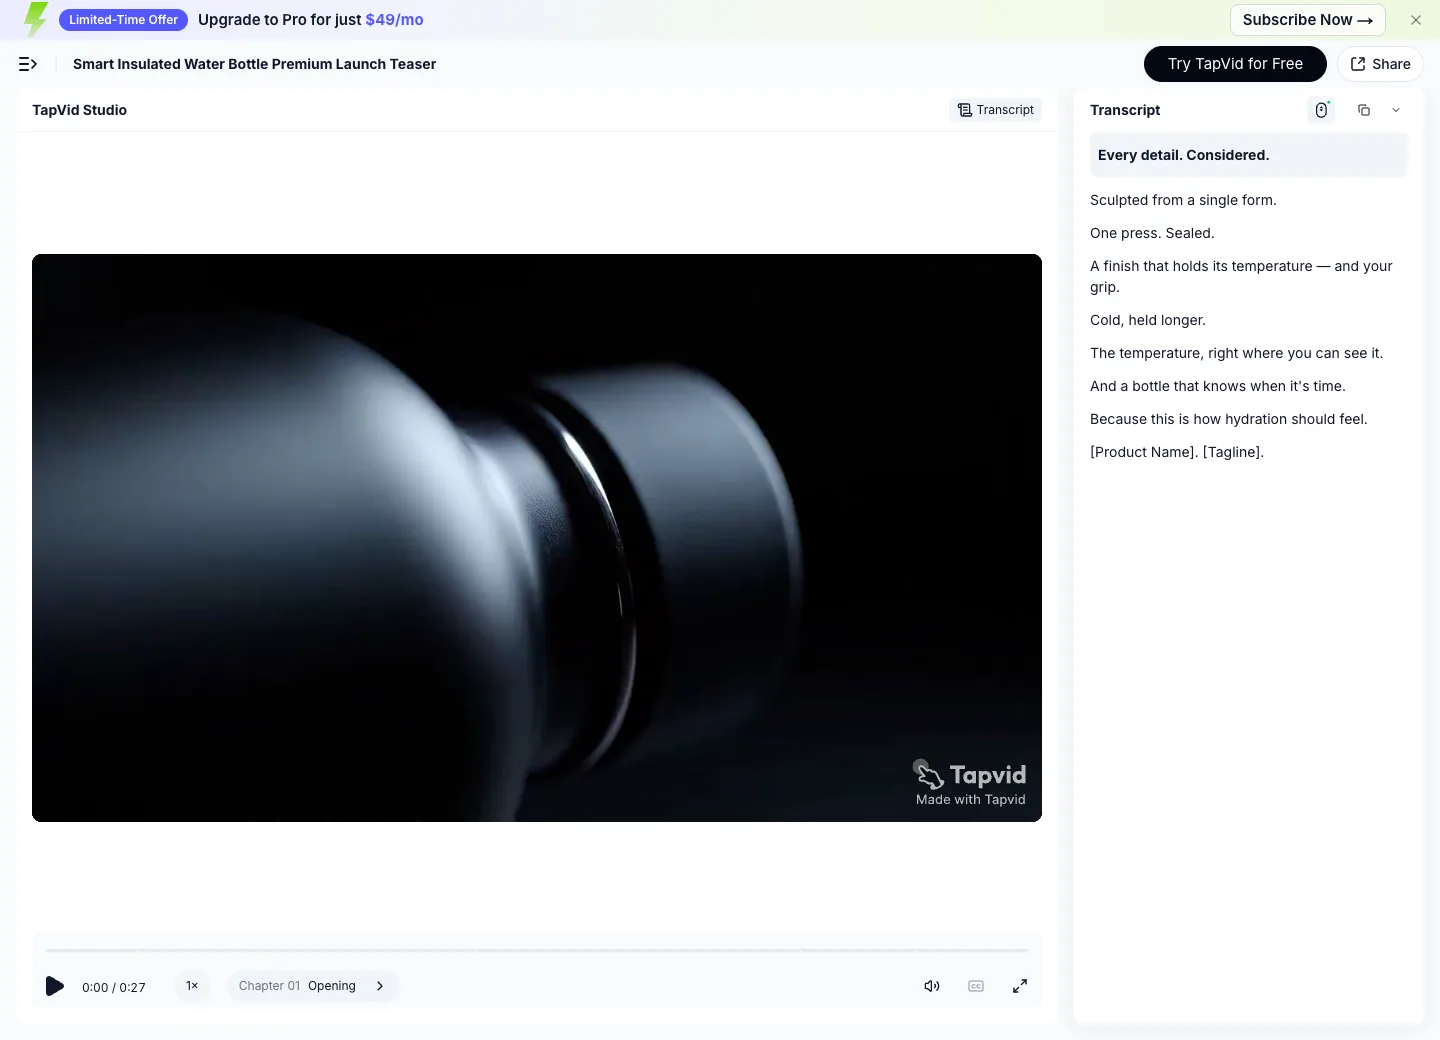
The exact MP4 from the case record is embedded below. The corresponding generated-video route is https://tapvid.ai/video/ZqyZMUPd. The screenshot and video prove what the published output contains. They do not prove the unrecorded brief, timing estimate, revision count, conversion result, or cost. Those remain unknown and should not be invented.
A reviewer can still apply the process to the visible result. The product form and temperature display can be checked as asset evidence. The transcript can be compared with on-screen moments. The placeholder product name is an explicit completion blocker for real publication, not something to hide with visual polish. That is the value of stage gates: they turn a vague feeling that the video is almost done into a concrete final action.
10
Process, workflow, and product production are different pages
This page owns the stages and their exit conditions. The video production workflow owns the operating system between roles, files, gates, and handoffs. The product video production guide owns claim-to-scene accuracy for one product. If you are choosing a production model for a small company, use small business video production.
If the task is specifically to make an explainer, use how to create an explainer video for the format-specific method. When approved source materials and copy are ready, the TapVid Explainer Video Engine provides the asset-led production route. Keep the boundary clear: a production tool can execute the approved plan, but it cannot decide which business claim is true or who has authority to approve it.
11
Frequently asked questions
What are the main stages of video production?
A practical business process has six stages: define the outcome, lock the source pack, build the script and scene map, make pre-production choices, produce in checkpoints, then review, revise, and deliver.
How is this different from pre-production, production, and post-production?
The classic three-part model is still valid. Six stages make the decision and approval boundaries more visible, especially the brief, source pack, scene map, and final delivery record.
What should be approved before production starts?
Approve the audience, outcome, channel, source assets, protected copy, script, scene-to-source map, ratio, language, audio approach, permissions, and delivery requirements.
How do you prevent expensive revisions?
Review meaning before polish, test one high-risk scene early, bind claims to source assets, and route each change to the smallest valid radius: block, scene, or brief.
Can AI replace the video production process?
AI can accelerate scripting, visualization, generation, and editing, but the team still needs verified source material, clear approvals, and an acceptance test for facts, assets, and correspondence.
What is the final delivery checklist?
Confirm the exact approved file, captions, audio, ratio, playback on the destination, product facts, claim-to-visual correspondence, source-pack version, approver, and known limitations.