
TL;DR
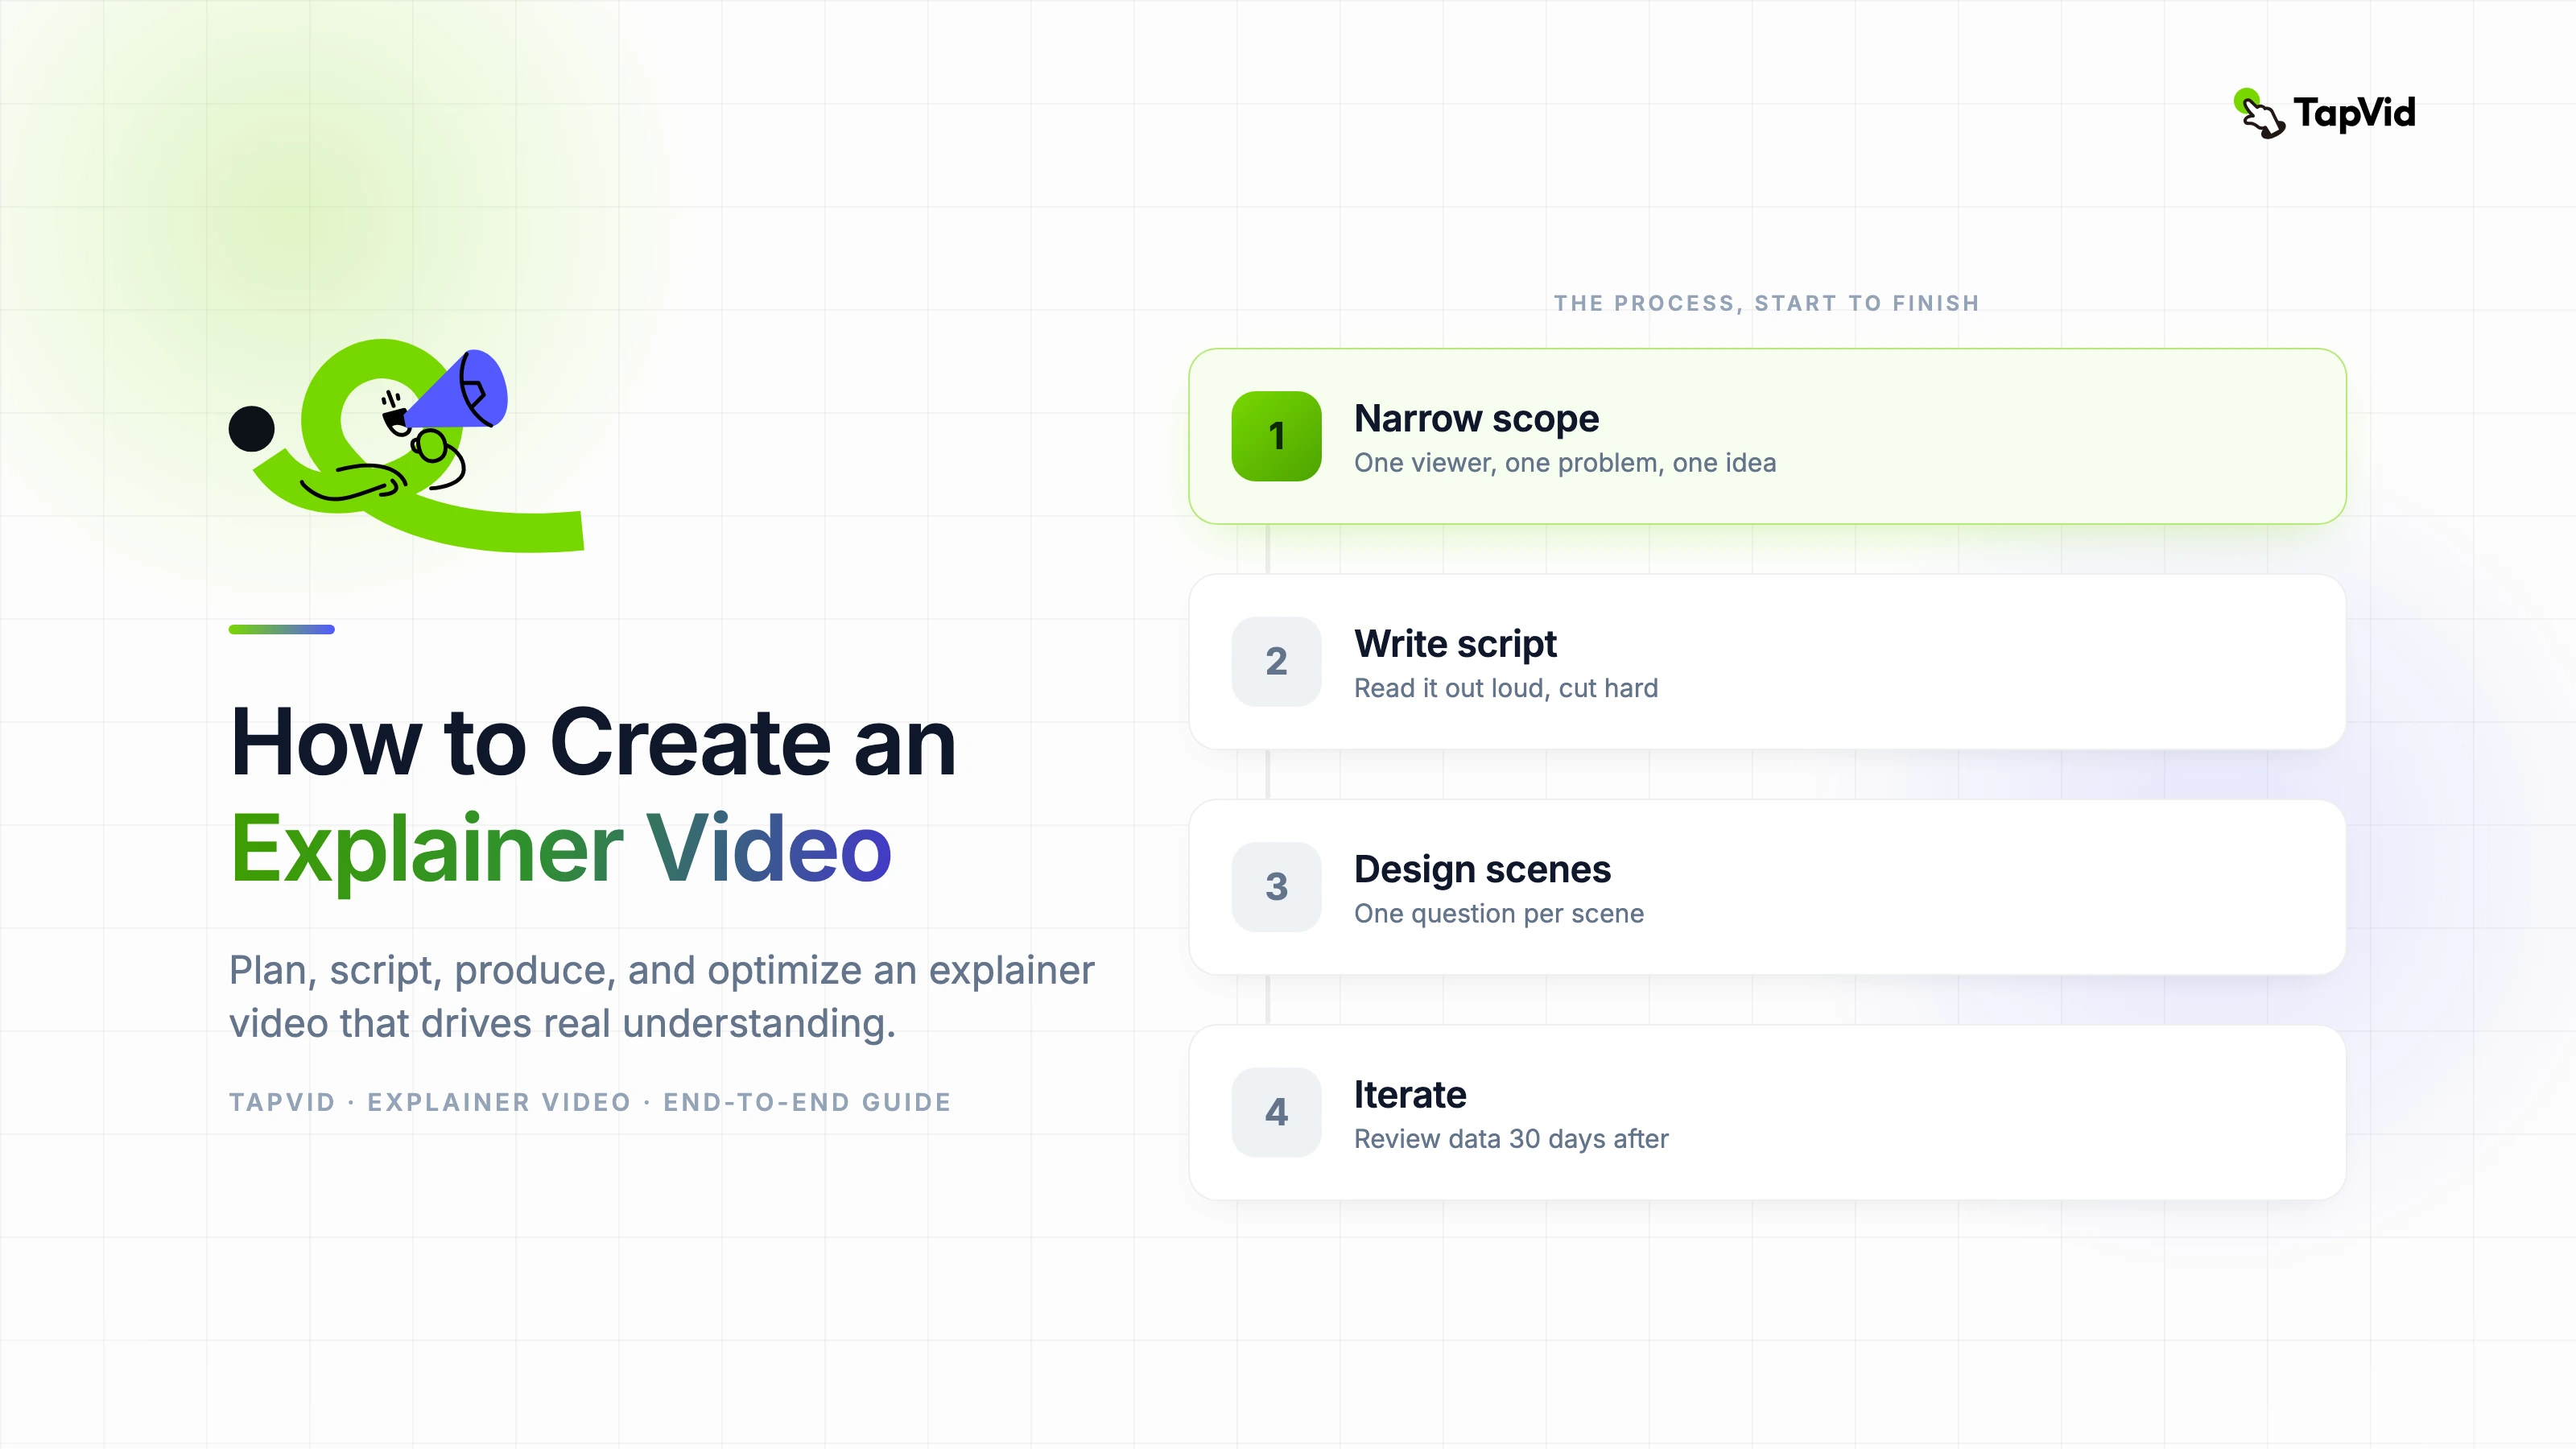
Define one viewer problem and CTA, approve an evidence-backed brief, write and time the spoken script, assign one visual job to every scene, review the first cut in three passes, verify the exported file, and measure one outcome after publishing.
A useful explainer video is not the result of one clever prompt. It is a chain of approved decisions: one viewer, one problem, one mechanism, one visual plan, and one next action. A fresh TapVid run followed that chain on August 6, 2026. This guide records the input, brief, 11-scene result, export details, credit change, and the checks required before publication.
Create an explainer video with TapVid
01
1. Define what the explainer must accomplish
Start with the change that should happen in the viewer, not with a list of product features. A practical explainer moves one person from a recognizable problem to a clear understanding of how a result is produced. That statement gives the project a boundary. If a fact, animation, or transition does not help produce that change, it belongs in another video, a help article, or the page surrounding the video.
Test the scope with five fields: viewer, problem, mechanism, proof, and next action. The mechanism matters because a promise without an explanation feels like advertising. Proof matters because an explanation without a visible result remains abstract. The next action matters because viewers need to know what to do with their new understanding. Write all five in plain language before selecting a tool or visual style.
- Viewer: name a role in a specific situation, not a broad market such as small businesses.
- Problem: describe the moment of friction the viewer already recognizes from work or daily life.
- Mechanism: state what changes in the process and why that change resolves the problem.
- Proof: choose one screen, example, result, or sequence the viewer can inspect for themselves.
- Next action: request one concrete step that continues the story rather than three competing CTAs.
A quick self-check is to remove the product name from the brief. If the remaining sentence still explains a useful before-and-after process, the scope is probably strong. If it collapses into words such as innovative, seamless, or powerful, the project has a positioning statement but not yet an explanation. Tighten the mechanism until another person can describe it without repeating your marketing copy.
02
2. Choose the source material, audience, and placement
An explainer can begin with an article, PDF, script, product page, PRD, sales deck, or a short prompt. These inputs are not equivalent. A finished script controls the spoken sequence but may lack visual evidence. A PRD contains precise behavior but usually includes details that a first-time viewer does not need. A product page contains benefits and proof, but its section order was designed for scrolling rather than linear viewing.
Before extracting material, decide where the video will appear. A landing-page explainer must make sense to someone who has not read the page. An onboarding video can assume the viewer has an account and may show exact interface labels. A sales follow-up can address a known objection. A social cut needs a visible premise in the first seconds because the surrounding context is weak. Placement changes both the opening and the amount of explanation required.
| Starting input | What it gives you | What to remove or add |
|---|---|---|
| Article or PDF | Evidence, examples, and a developed argument | Remove reading-only detail and rebuild the order for scenes |
| PRD or help document | Accurate steps, labels, and edge cases | Add audience context, benefits, and a reason to care |
| Product page | Positioning, proof, and CTA language | Verify claims and replace scroll order with a narrative |
| Approved script | Controlled narration and timing | Add visual jobs, source links, and pronunciation notes |
| Short prompt | Fast direction for an early draft | Add evidence, constraints, and explicit approval criteria |
- Record what the audience already knows so the opening does not repeat obvious category education.
- Name the channel and aspect ratio before building scenes, even if the ratio may change after the brief.
- List any interface, legal, medical, financial, or product claims that require an owner to approve them.
- Keep links to the exact source passages used for numbers, quotations, UI labels, and product behavior.
03
3. Build an evidence-backed production brief
The brief is the cheapest place to prevent an expensive misunderstanding. It should state the audience, viewing context, single promise, mechanism, proof, CTA, runtime, language, voice, aspect ratio, visual system, required scenes, prohibited claims, and final approver. A good brief is specific enough that two creators would make recognizably similar stories, while still leaving room for visual craft.
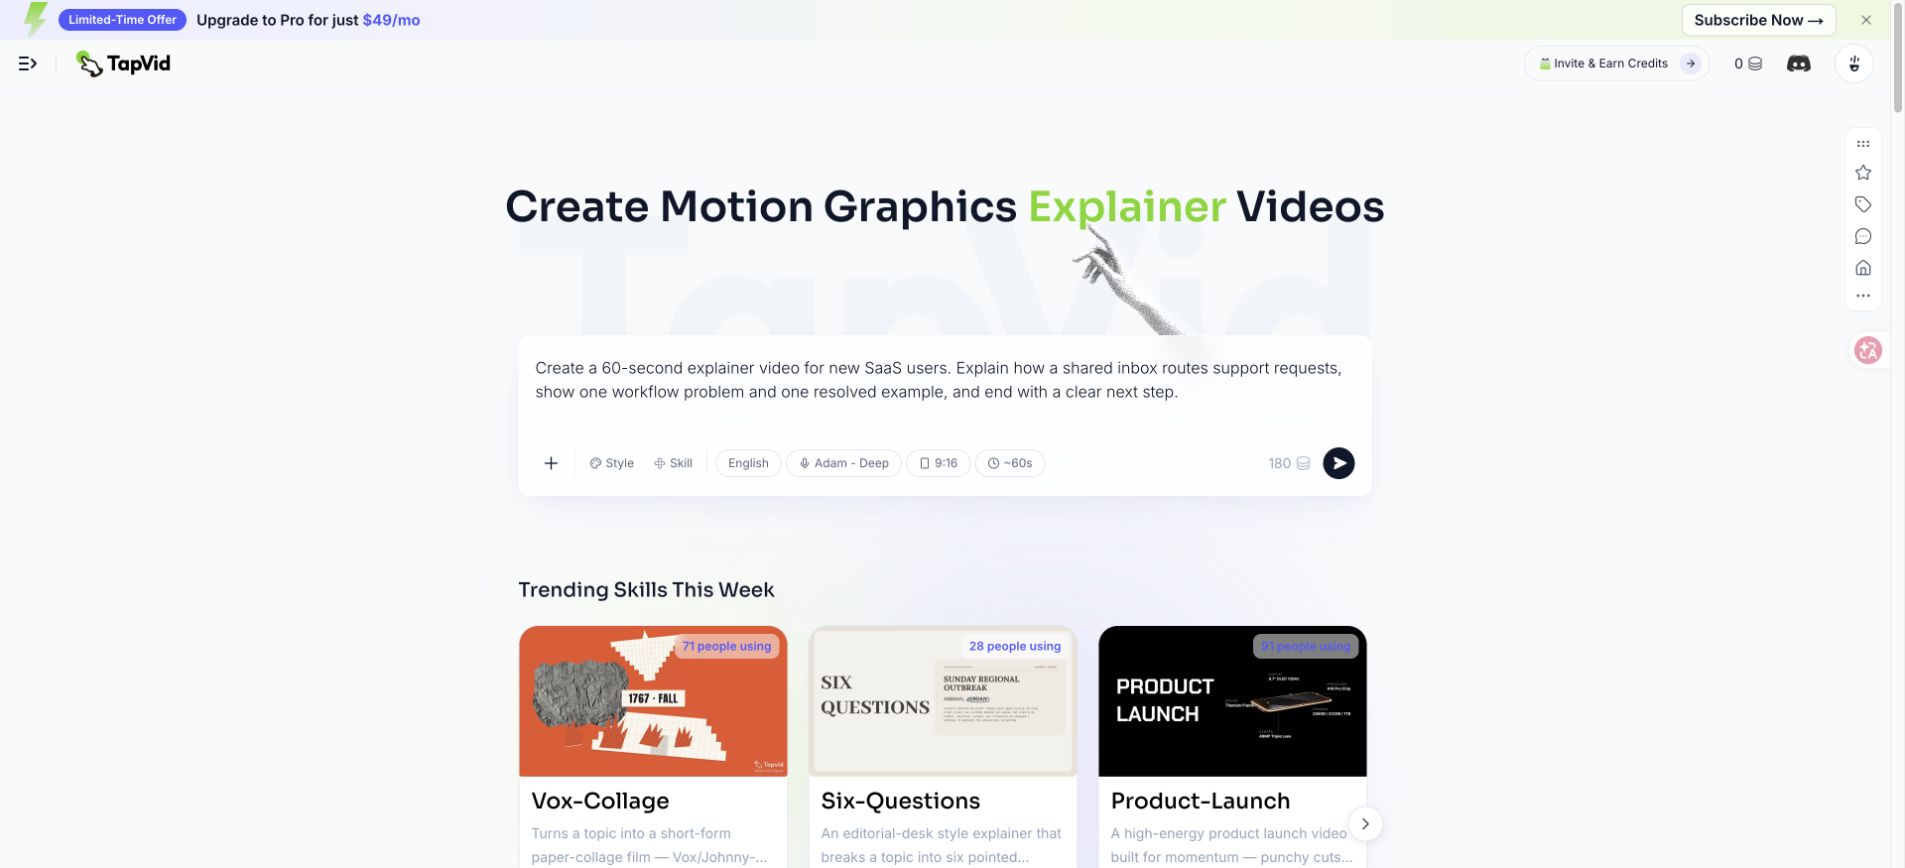
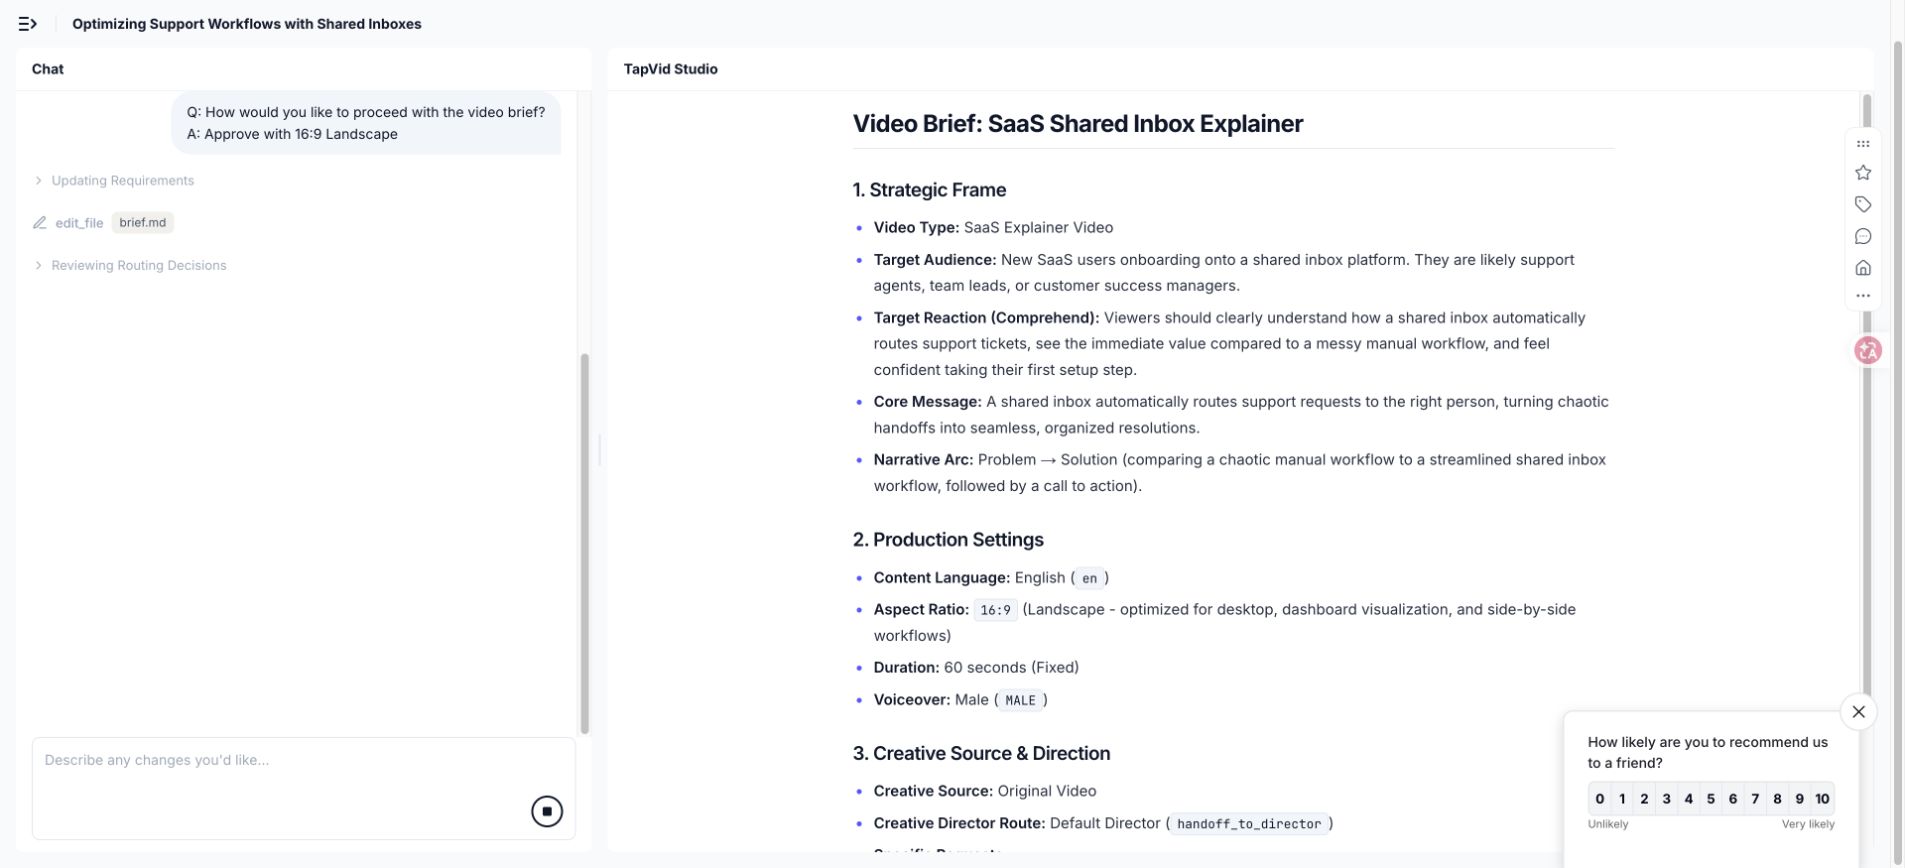
The hands-on run requested an approximately 60-second SaaS explainer about a shared support inbox. The story had to show overlapping replies, routing rules, organized channels, and a final action to create the first rule. The settings used English and the Adam Deep voice. The initial request used 9:16 because it began as a social-oriented idea, and TapVid displayed a 180-credit estimate before the full run.
- Audience and situation: who is watching, where they encounter the video, and what they already understand.
- Message and mechanism: the one promise plus the process that makes the promise believable.
- Evidence packet: approved product screens, source URLs, exact labels, numbers, and claim owners.
- Production constraints: duration, ratio, voice, brand colors, caption needs, and prohibited visual treatments.
- Approval gates: who signs off the outline, script, storyboard, first cut, and final export.
Do not hide uncertainty inside polished language. If a number is unverified, label it as unavailable or remove it. If a workflow differs by plan, state which plan the footage represents. If the product changes frequently, capture the date and version. These details make the brief easier to review and protect the final video from implying that an observed test result is a universal guarantee.
04
4. Set a realistic runtime and information budget
Runtime is an information constraint, not a quality score. A 60-second product explainer can usually establish one problem, reveal one mechanism through a few beats, show one proof moment, and ask for one action. It cannot teach every configuration option. A 90-second version can include a second example or a more deliberate proof sequence. A two-minute explanation can support a technical concept, but only if each additional scene earns its time.
Word-count formulas are planning tools, not timing guarantees. Voice, sentence length, unfamiliar terms, pauses, and on-screen reading all affect pace. A draft of 140 words can feel rushed when it contains product names and acronyms, while a conversational 155-word draft may sound comfortable. Record a rough read at a natural pace, then allow time for visual comprehension instead of speeding up the voice to rescue an oversized script.
| Target length | Planning range | Best fit | Common scope error |
|---|---|---|---|
| 30 seconds | 55 to 75 spoken words | One problem, one mechanism, one CTA | Adding company history or multiple personas |
| 60 seconds | 120 to 150 spoken words | Focused product or service explanation | Treating every feature as a separate benefit |
| 90 seconds | 175 to 220 spoken words | Problem, mechanism, proof, and an extra example | Using the extra time for repetition |
| 120 seconds | 235 to 300 spoken words | Technical, educational, or process explanation | Removing visual pauses to fit more narration |
- Budget seconds for the viewer to read important interface labels, numbers, or comparison states.
- Leave a small timing margin because translated versions may expand or require different line breaks.
- Cut secondary examples before compressing the core mechanism or the evidence that supports it.
- Keep the CTA visible long enough to read and act on; do not treat it as an end-card flash.
05
5. Write the spoken script before designing scenes
Write for the ear. Spoken sentences need a clear subject, active verb, and one idea. Avoid stacking three clauses because the viewer cannot move their eyes backward to recover the first one. Read every line aloud and mark where you run out of breath, hesitate over terminology, or need to explain a noun. Those marks expose writing problems that look harmless on a page.
A dependable sequence is hook, problem, mechanism, proof, and CTA. The hook should identify the situation rather than announce that the company has an answer. The problem should show a consequence, not simply repeat the hook. The mechanism should explain what changes in the workflow. Proof should resolve the exact problem introduced at the start. The CTA should name one action the viewer can visualize.
- Hook: name the familiar moment, such as two teammates replying to the same support request.
- Problem: show the cost, such as contradictory answers, duplicated work, or an unowned request.
- Mechanism: reveal routing rules assigning each request to the right channel and owner.
- Proof: show a new request arriving once, being assigned once, and receiving one coordinated response.
- CTA: invite the viewer to create the first routing rule instead of vaguely asking them to learn more.
Keep a separate evidence note beside each claim. If the script says a rule routes requests automatically, identify the product screen or documentation that proves it. If the script uses a measured result, keep the source and capture date. This two-track process separates persuasive writing from claim verification and makes later review faster. The dedicated script guide in this cluster provides the complete template and annotated example.
06
6. Select a visual approach that matches the explanation job
Style should solve an explanation problem. Motion graphics can make an invisible flow visible. A UI demonstration can prove that a workflow exists, but it can overwhelm a first-time viewer when every control is shown at once. Character animation can make a recurring human problem memorable. Live action can build trust or demonstrate a physical process. A hybrid format can combine context with product proof, but it also creates more continuity work.
Choose by asking what the viewer must see to believe the mechanism. If the value depends on an interface action, include the interface or a simplified representation of it. If the product coordinates systems, use a diagram that shows movement and state changes. If the explanation is emotional or behavioral, a character or real person may carry the story better than floating UI cards. Visual novelty is secondary to legibility.
| Format | Strongest use | Watch for |
|---|---|---|
| Motion graphics | Abstract systems, data flow, and category education | Metaphors that look elegant but conceal the actual mechanism |
| UI-led | Product onboarding and workflow proof | Tiny labels, fast cursor movement, and obsolete screens |
| Character animation | Human pain, behavior change, and multi-role stories | Stock expressions that weaken a serious subject |
| Live action | Physical products, trust, demonstrations, and founder stories | Production demands that do not add explanatory value |
| Hybrid | Context plus product proof | Abrupt visual transitions and inconsistent pacing |
- Specify a stable palette, type hierarchy, icon family, perspective, and motion pace in the brief.
- Use contrast to signal state change, not simply to make every scene visually different.
- Reserve detailed UI for the moment it proves the mechanism; simplify supporting screens.
- Check captions and key labels at mobile width before approving the visual system.
07
7. Convert the script into an approval-ready storyboard
A storyboard is a decision record, not a collection of pretty frames. Give every scene one spoken idea, one visual job, one evidence source, and one transition reason. The visual job can establish context, demonstrate a mechanism, compare states, reveal proof, or hold the CTA. If a scene has no job, it is decoration. If it has three jobs, divide it or simplify the script.
Write the narration and visual plan in adjacent columns. This exposes two common problems. First, the visual may simply repeat the narration as text, leaving one communication channel unused. Second, the visual may introduce a new concept that the narration never explains. The best pairings divide the work: narration provides meaning while the visual provides spatial, procedural, or comparative evidence.
- Scene purpose: write the question this scene answers for the viewer.
- Narration: keep one spoken idea and mark any pronunciation or emphasis requirement.
- Visual job: describe the state change, comparison, action, or evidence rather than an aesthetic mood.
- On-screen text: include only words the viewer must read, verify, or remember.
- Transition: explain what connection justifies moving from this scene to the next.
- Approval note: name the person responsible for product accuracy, brand, and final editorial judgment.
Review the storyboard without motion. A reviewer should be able to follow the argument from thumbnails, narration, and captions. If the logic depends on a transition effect to make sense, the sequence is fragile. Fix missing context, unexplained state changes, or unsupported proof before generation. Storyboard revisions are cheap; replacing interconnected scenes after timing and voice are locked is not.
08
8. Run the approved workflow in TapVid
The August 6 test began with the shared-inbox prompt, English, Adam Deep, an approximately 60-second duration, and a 9:16 starting ratio. TapVid produced a structured production brief in about 40 seconds during this observed run. The brief recommended 16:9 because the story relied on interface states and routed channels. That change was approved before the full production continued.
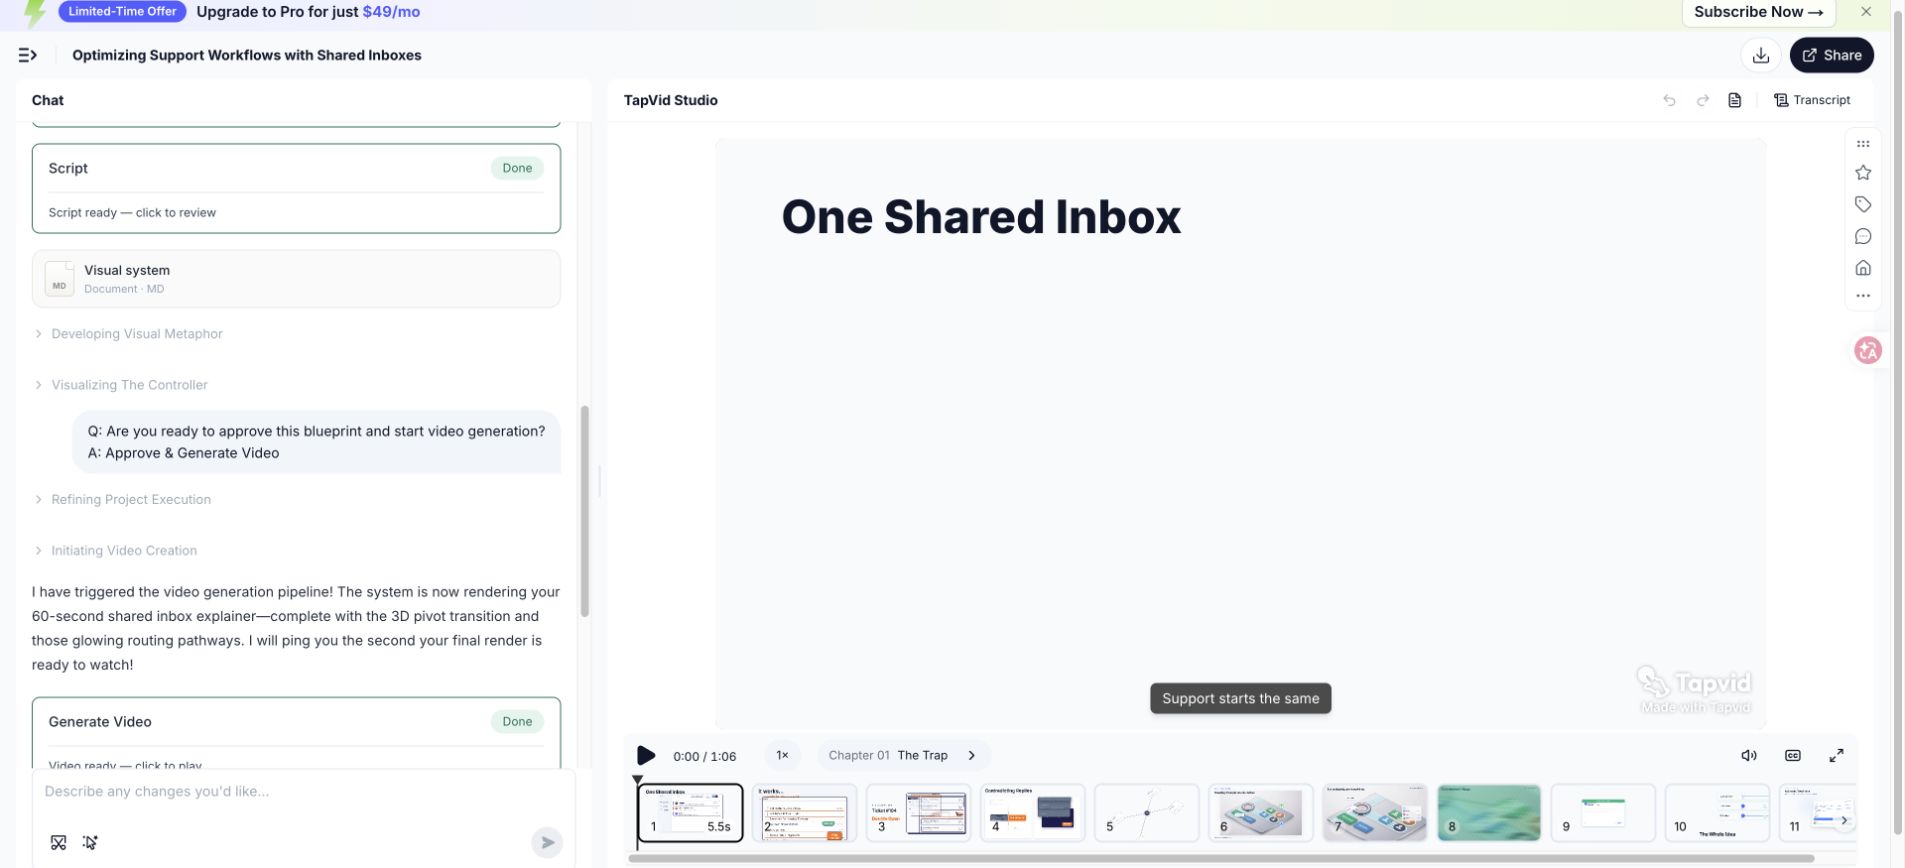
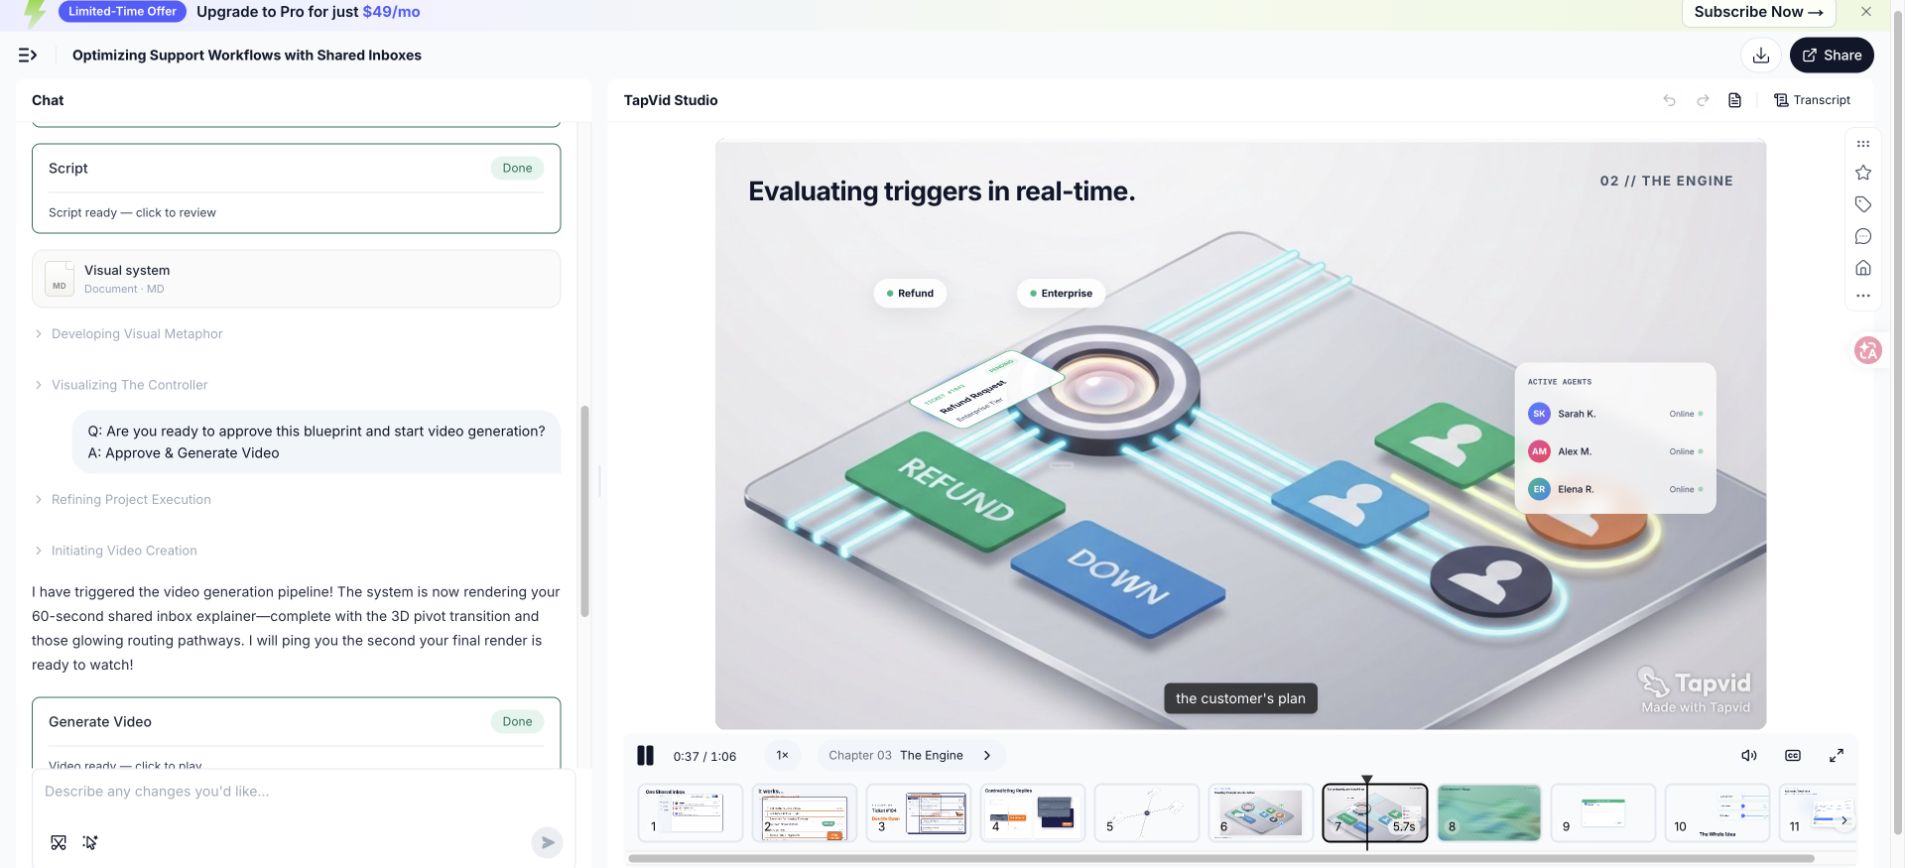
The full observed workflow took about eight minutes from the approved brief to a reviewable project. The result contained four chapters and 11 scenes. These measurements describe this one test on this date. They are not a promise that every source, script, or account will produce the same time, scene count, or credit use. Complexity, revisions, availability, and product changes can alter the result.
- Confirm that a proposed ratio change improves the explanation instead of accepting it automatically.
- Compare the generated outline with the approved mechanism, proof, and CTA before reviewing polish.
- Check that the visual system remains consistent across chapters and does not reset without a story reason.
- Record any settings, recommendations, and approvals that changed between the initial prompt and generation.
- Capture evidence while the project is open so later claims can be tied to a specific screen and date.
The generated project is a first cut, not a publish decision. Automation can organize a story and build connected scenes quickly, but the reviewer still owns product accuracy, narrative emphasis, captions, brand details, and the final claim boundary. Treat each generated scene as a proposal that must answer the storyboard question established earlier.
09
9. Review the first cut in three separate passes
Trying to review everything at once produces vague feedback. Use three passes. The story pass ignores polish and asks whether the argument is complete, accurate, and in the right order. The scene pass checks whether each visual performs its assigned job and connects to neighboring scenes. The silent pass turns off the sound and checks captions, labels, visual hierarchy, and whether the main process can still be followed.
In the test playback, the isometric style and palette stayed reasonably consistent, and the subtitles were visible. That did not make every scene automatically correct. The review still compared the opening problem, routing sequence, resolved request, and CTA against the approved brief. The useful question is not whether a scene looks professional in isolation. It is whether the scene advances the promised explanation.
| Review pass | Questions | Typical fix |
|---|---|---|
| Story | Is the problem recognizable? Is the mechanism accurate? Does proof resolve the opening? | Reorder, remove, or rewrite before polishing visuals |
| Scene | Does each visual have one job? Are state changes and transitions understandable? | Replace a mismatched visual or split an overloaded scene |
| Silent | Can captions and important labels be read? Does hierarchy survive without narration? | Shorten text, increase contrast, or hold the frame longer |
- Collect factual corrections separately from style preferences so accuracy is resolved first.
- Ask reviewers to name the scene, problem, and proposed outcome instead of saying it feels off.
- Recheck duration after any narration change because one edit can shift several downstream scenes.
- Watch once at normal size on a phone before approving text-heavy or interface-led sequences.
10
10. Diagnose common explainer video failures
A weak explainer often looks like a production problem when the real failure is editorial. A vague opening makes the rest of the video work harder because the viewer does not know which problem to track. A feature dump removes the causal chain between problem and result. A beautiful metaphor can hide the mechanism. Multiple CTAs make the ending feel like navigation rather than a conclusion.
Diagnose by tracing the five fields from the original scope. If the viewer is unclear, rewrite the opening situation. If the problem has no consequence, show a concrete failed state. If the mechanism is missing, replace benefit language with an observable process. If proof is weak, show the resolved version of the opening. If the CTA is vague, make it an action that can appear on the final frame.
| Symptom | Likely cause | Specific repair |
|---|---|---|
| The opening could describe any company | Category language replaced a real situation | Name a role, trigger moment, and visible friction |
| The middle feels like a list | Features have no causal order | Arrange scenes around the mechanism and one before-and-after example |
| Narration and visuals compete | Both channels introduce different ideas | Give narration meaning and visuals one evidence job |
| UI cannot be read | The capture is too dense or moves too quickly | Crop to the relevant state, enlarge labels, and extend the hold |
| The ending feels abrupt | Proof and CTA were treated as an end card | Resolve the opening problem, then hold one action visibly |
| Reviewers keep requesting additions | Scope has no written acceptance test | Return every request to viewer, mechanism, proof, and CTA |
- Remove unsupported superlatives before spending time improving their animation.
- Replace generic stock scenes when the script depends on a specific product or process state.
- Shorten captions before shrinking type; small text solves the editor layout, not the viewer problem.
- Do not add a second persona halfway through a short video unless the relationship is the mechanism.
11
11. Verify the exported file, not only the editor preview
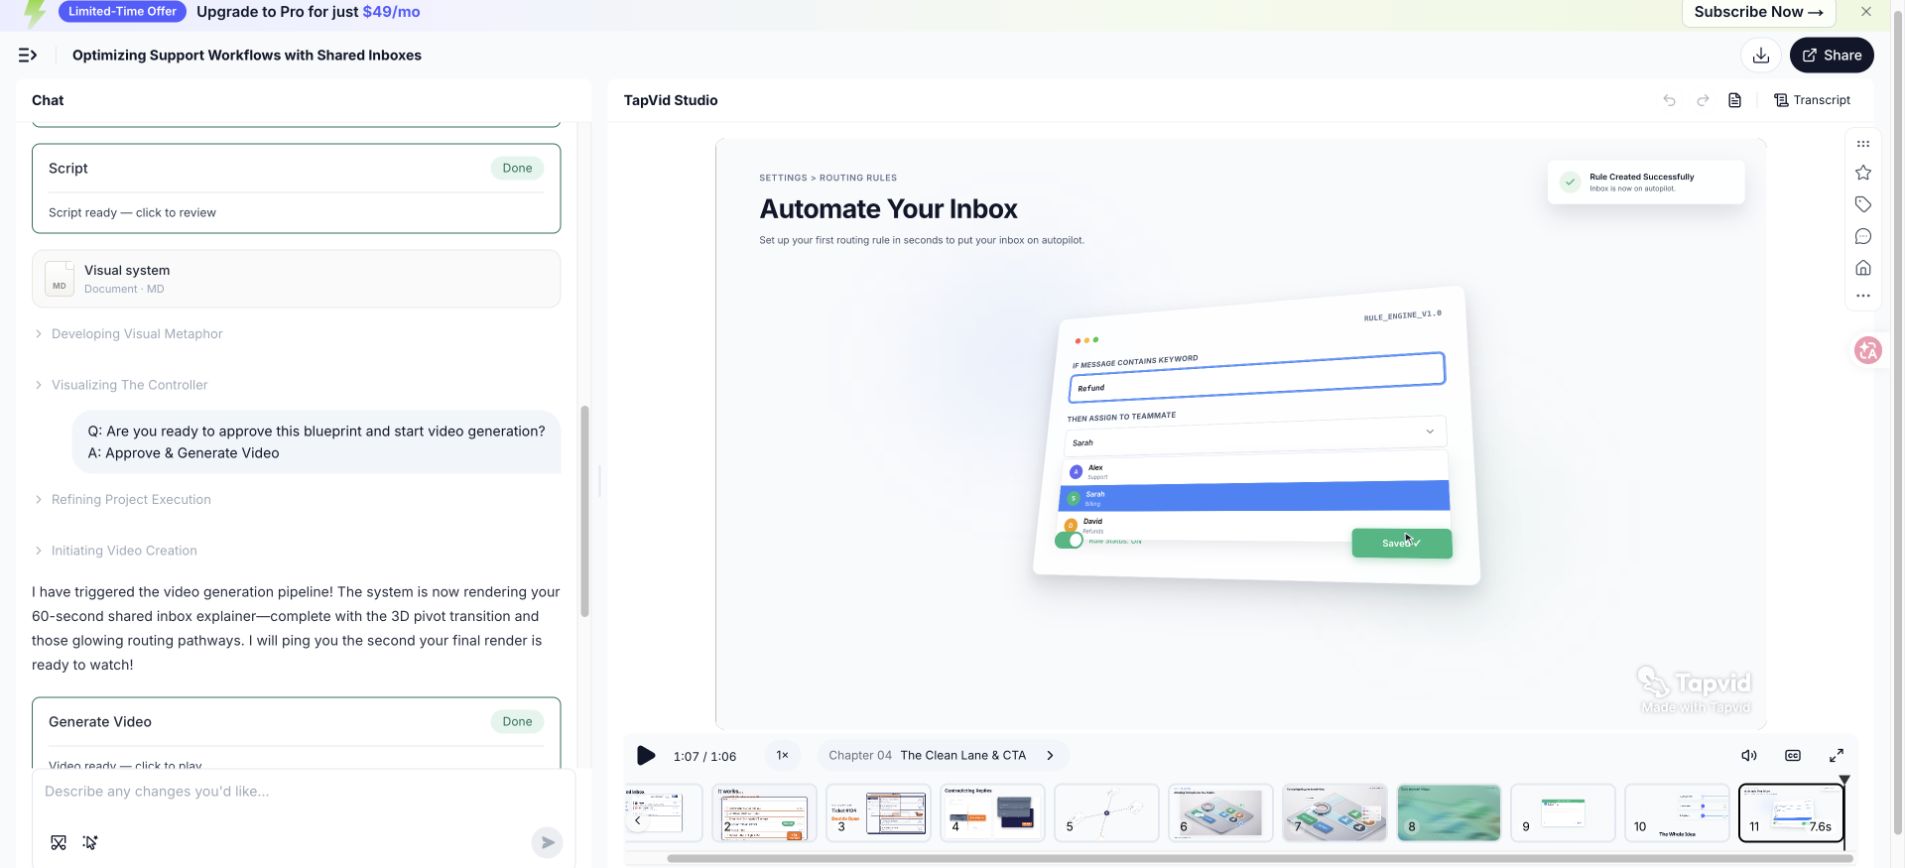
The export is the deliverable. Play it outside the editor and record objective properties before publishing. The file from this hands-on run measured 66.837 seconds, 1280 by 720 pixels, 30 frames per second, H.264 video, AAC audio, and 9,251,501 bytes. The final frame included the intended next action. Because the run used the Free Plan, the exported video also displayed the observed TapVid watermark.
The input screen estimated 180 credits. The account balance changed from 500 to 302 during the observed workflow, which is a 198-credit difference. Keep those numbers separate. An estimate is not an invoice, and one observed balance change should not be promoted as a fixed price. Current plan details and credit rules must be checked on the official pricing or product interface when the article is reviewed.
- Play the complete exported file with headphones and speakers to catch clipping, silence, or abrupt music changes.
- Confirm duration, resolution, frame rate, codec, audio track, file size, watermark, and caption behavior.
- Check the first and last frames because platform thumbnails and autoplay can expose unintended states.
- Compare every number, product label, and CTA with the approved script and current product interface.
- Test the final file at mobile width and on the destination page rather than approving it in isolation.
Save the approved script, brief, source links, export properties, and final file together. That package lets another teammate understand why the video says what it says and update it when the product changes. A clean handoff also distinguishes editorial approval from technical export approval, which prevents a correctly encoded file from being mistaken for a factually approved video.
12
12. Publish with context and measure one outcome
A video needs surrounding context. Add a descriptive title, thumbnail, short text summary, transcript or useful written companion, captions, and one nearby action. The page should explain who the video is for and what it will help them understand. Search engines and viewers who cannot play audio both benefit from text, while captions must be reviewed for names, product labels, and line breaks rather than accepted as raw output.
Choose one measurement that matches the placement. A landing-page video might be evaluated with play rate, completion by scene, CTA clicks, and downstream conversion. An onboarding video may use task completion and support requests. A sales follow-up may use replies or progression to the next step. Do not interpret a high completion rate as proof of business impact if the intended action does not change.
| Placement | Primary question | Useful measures |
|---|---|---|
| Landing page | Does the video help a qualified visitor take the next step? | Play rate, scene retention, CTA click, downstream conversion |
| Onboarding | Does the viewer complete the explained workflow? | Task completion, time to first result, related support requests |
| Sales follow-up | Does the explanation resolve the known objection? | Reply quality, next-meeting progression, repeated questions |
| Education or training | Can the viewer recall and apply the process? | Knowledge check, task accuracy, repeat viewing by section |
| Social | Does the opening earn attention from the intended audience? | Qualified watch time, saves, relevant comments, destination clicks |
- Record the publish date, placement, version, audience, and CTA so later comparisons use the same context.
- Inspect scene-level drop-off when available; one weak scene is more actionable than a single completion average.
- Change one major variable at a time, such as the opening, proof sequence, runtime, or CTA.
- Update or replace product footage when interface changes make the mechanism inaccurate.
The first iteration should produce a learning decision, not a dashboard. If viewers leave before the mechanism, test a tighter problem and earlier reveal. If they watch but do not act, review the proof, destination, and CTA continuity. If they complete the task but replay one section, make that step clearer. Each revision should point back to a specific viewing behavior and a specific scene.
13
13. Explainer video production FAQ
The answers below are planning guidance, not universal promises. Continue with the script template and 15-example analysis. For publish metadata, use Google's video structured data documentation.
How long should an explainer video be?
Use the shortest runtime that can establish the problem, explain the mechanism, show proof, and hold one CTA without rushing. About 60 seconds often fits a focused product explanation. Technical, training, or multi-step processes may need 90 to 120 seconds or a series of shorter videos. Record a natural read and storyboard the visual holds before locking duration.
Do I need animation skills to create an explainer video?
Not necessarily. A creator can use an explainer video engine, templates, UI capture, live action, or a hybrid workflow. The essential skills are scoping the message, verifying claims, writing spoken language, assigning visual jobs, and reviewing the output. More complex custom motion systems still benefit from an experienced designer or animator.
What should I prepare before using an AI explainer video tool?
Prepare the audience, problem, mechanism, proof, CTA, target runtime, placement, aspect ratio, voice preference, brand constraints, approved source links, product screens, pronunciation notes, and prohibited claims. A concise evidence-backed brief produces a more reviewable first cut than a broad prompt asking the tool to explain the whole company.
Can AI create the final video without human review?
A generated result still needs human review for product accuracy, claim support, narrative emphasis, visual continuity, captions, pronunciation, brand details, export properties, and current plan limitations. Automation can reduce production work, but the publisher remains responsible for what the video states and implies.
How much does an explainer video cost?
Cost depends on runtime, format, custom design, voice, footage, revisions, localization, and whether work is done with a tool, freelancer, internal team, or studio. For software, verify current official plan and credit information. Do not estimate a project from the observed 198-credit change in this one test because it is not a universal rate.
Should I make one video for every channel?
Start with one approved core story, then adapt the opening, ratio, captions, duration, and CTA for each placement. A landing-page viewer, an existing user, and a social viewer arrive with different context. Reframing the same evidence is usually safer than forcing one export to serve every audience and format.
How do I localize an explainer video?
Plan localization before production. Keep the source script clear, save pronunciation notes, avoid text baked unnecessarily into visuals, and expect sentence length to change. Translate the meaning and spoken rhythm rather than word order, then retime scenes, review localized UI, captions, numbers, and CTA language with a fluent reviewer.
What files belong in the final handoff?
Include the approved brief, script, storyboard, evidence and source links, pronunciation notes, brand assets, editable project when applicable, master export, caption files, thumbnail, transcript, aspect-ratio variants, export properties, approval record, and a note describing which product version and plan were shown.