

Motion Graphic Design System: Build Reusable Scenes That Scale
How to build a motion graphic design system with reusable modules, cleaner revisions, and stronger output consistency.
Apr 16, 2026 · 11 min read

Loading...
A practical guide to AI image to video workflows, including prompt structure, image selection, editing passes, and where these tools actually save time.
Summarize with
11 min read
Written and edited by
Yibo Wang
CPO & Head of Product Design, SigmaZ AI Company
The fastest way to waste time with AI image to video tools is to expect them to invent a story from a single picture. They are much better at extending a clear visual idea than rescuing a vague one. When the source image already has a defined subject, lighting direction, and emotional tone, these tools can produce short videos that feel intentional instead of random. This guide is the workflow I use when a team wants motion from a still asset without building a full animation pipeline.
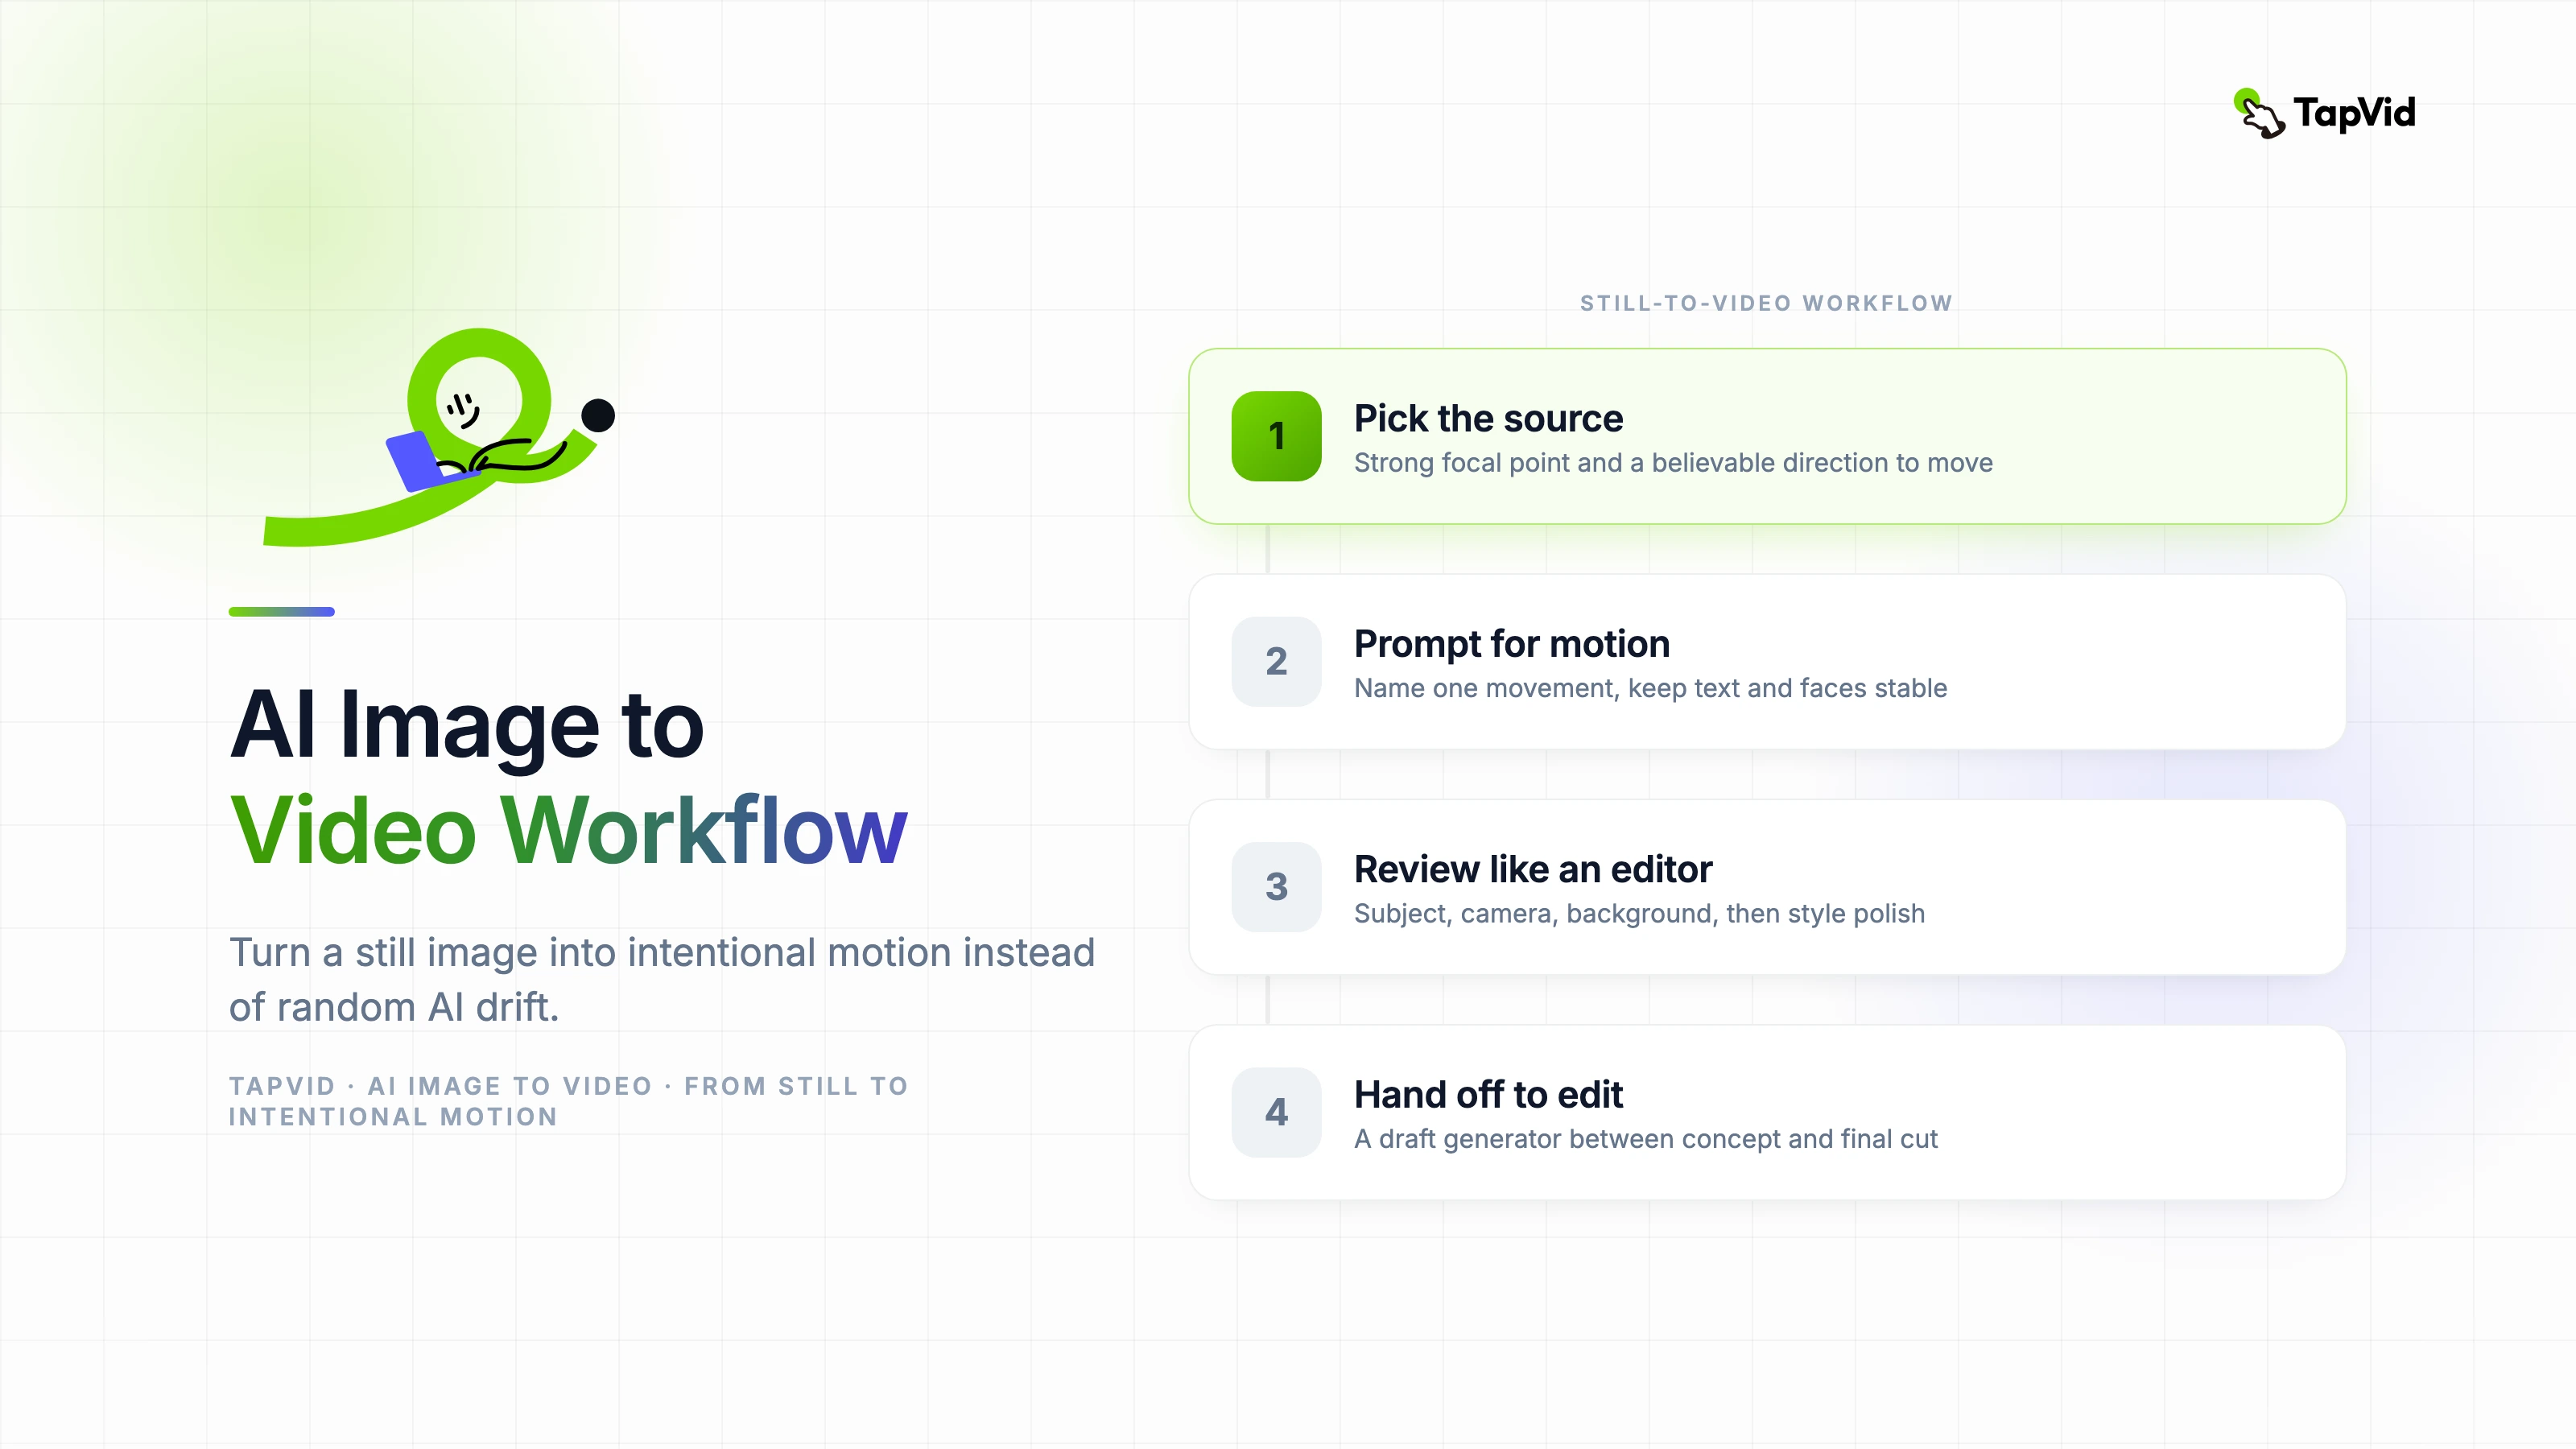
AI image to video works best when the input image already contains a strong focal point and a believable direction for movement. A product photo with clear lighting, a character portrait with visible depth, or a scene with foreground and background separation all give the model something usable to extend.
The worst source images are visually busy and compositionally flat. If every object in the frame competes for attention, the generated motion becomes indecisive. The model starts inventing movement everywhere because it has not been given a hierarchy.
Before generating anything, ask a simple question: what is supposed to move, and what is supposed to remain stable? If you cannot answer that in one sentence, the image is not ready.
Most weak outputs come from prompts that describe style but not motion. Saying "cinematic, beautiful, dramatic" tells the model almost nothing about what should happen over time. Motion prompts need verbs and constraints.
A stronger prompt names the subject, the camera behavior, the speed, and the visual priority. For example: "Slow camera push toward the product box, soft ambient background movement, keep logo stable, no object warping." That kind of instruction narrows the output into something a real production team can refine.
The highest-ROI use cases are social cutdowns, product teasers, landing page hero loops, and short educational inserts. In those formats you do not need a fully animated scene with exact continuity. You need controlled motion that adds life to an existing visual.
This is especially useful for teams with plenty of static assets but no animation bandwidth. A campaign that already has product renders, illustrations, or photography can produce motion variations without starting over in a timeline-based tool.
It is much less effective for narrative scenes that require character consistency, dialogue, or precise cause-and-effect movement. Those still need a more controlled production system.
The first render should be judged on structure before aesthetics. Does the movement support the message? Does the viewer know where to look? Is the subject stable enough to survive compression on a real platform?
Teams often waste time polishing an output that already has a structural problem. If the motion path is wrong, regenerate early. If the motion path is right but the details are messy, then a cleanup pass makes sense.
I use a simple review order: subject stability first, camera behavior second, background motion third, style polish last. That sequence prevents cosmetic tweaks from hiding a broken core motion idea.
Treat AI image to video as a draft generator between concept and final edit. Export the best take, bring it into your editor, then add brand-safe text, music, captions, and transitions in a controlled environment.
For teams using TapVid, this kind of generated clip works best as a supporting visual inside a larger explainer or product story. It can introduce a concept quickly, then hand off to a more structured scene sequence that carries the real explanation.
The metric that matters is not whether the generated clip looks impressive in isolation. It is whether it reduced production time while still doing the communication job the shot was meant to do.
Related articles
How to build a motion graphic design system with reusable modules, cleaner revisions, and stronger output consistency.
Apr 16, 2026 · 11 min read
A practical video animation pipeline for marketers, product teams, and educators using TapVid.
Apr 16, 2026 · 11 min read
A review-first storyboarder AI workflow to improve scene quality before animation starts.
Apr 16, 2026 · 10 min read
Join thousands of product teams using AI to create professional videos in minutes.